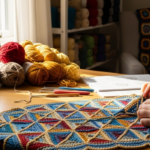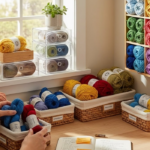
You’ve just finished your very first crochet blanket—soft, cozy, and bursting with color. You hold it up, admiring your hard work… and then you see it. Dozens of loose ends sticking out like unruly hairs after a bad haircut. Your heart sinks. All that love, time, and patience—and now this?
Don’t panic.
What most beginners don’t realize is that finishing is where the magic really happens. It’s not just about making stitches—it’s about transforming your project from “almost done” to “professionally polished.” Weaving in ends and blocking might sound like boring chores, but they’re the secret sauce that turns handmade items into heirlooms.
In this guide, we’ll walk you through the two most overlooked—but absolutely essential—steps in crochet finishing: weaving in ends and blocking. No jargon. No overwhelm. Just clear, simple, step-by-step advice you can use today—even if you’ve never done either before. By the end, you’ll know how to make your creations look store-bought, feel luxurious, and last for years.
Let’s turn those messy ends into smooth, invisible finishes—and your lumpy squares into beautifully shaped masterpieces.
Why Finishing Matters More Than You Think
Let’s be honest: most of us get excited about starting a new project. The yarn, the colors, the possibilities—it’s thrilling. But by the time we reach the last row? We’re ready to toss it in a bag and call it done.
Here’s the truth: unfinished crochet looks cheap. Even the most intricate pattern can look sloppy if ends are hanging out or the shape is uneven. Imagine wearing a handmade scarf that curls at the edges or a blanket that looks like it’s been sat on by a sleepy cat. Not exactly gift-worthy, right?
Finishing isn’t just about aesthetics—it’s about respect. Respect for your time, your skill, and the person who’ll receive your creation. A well-finished piece says, “I cared enough to do it right.”
Think of it like baking a cake. You could serve it straight out of the oven—warm, delicious—but if you frost it, level the layers, and add a dusting of powdered sugar? Suddenly, it’s special. Weaving ends and blocking are your crochet’s frosting.
And here’s the best part: both processes take less than 30 minutes total for most projects. That’s less time than scrolling through social media. Yet the difference it makes is night and day.
Plus, finished pieces last longer. Loose ends can snag, unravel, or collect lint. Unblocked items lose their shape over time—especially garments. A properly blocked shawl holds its drape. A finished afghan stays square. That’s the difference between something you use once and something you pass down.
So let’s get those ends tucked away—and those edges looking flawless.
How to Weave in Ends Like a Pro (No Knots, No Mess)
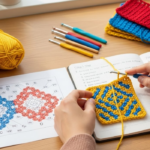
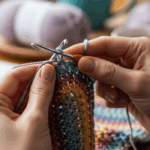
Weaving in ends sounds intimidating, but it’s really just sewing with yarn. Think of it like threading a needle and stitching a tiny seam—except you’re hiding your yarn, not joining fabric.
Here’s how to do it right:
Step 1: Use the Right Tool
Grab a large-eye yarn needle (the kind with a blunt tip). Don’t use a sewing needle—it’s too sharp and can split your stitches. If you don’t have one, a clean safety pin works in a pinch.
Step 2: Leave Enough Tail
When you cut your yarn at the end of a row, leave at least 6 inches. That’s enough to weave in securely without risking it popping out later. Pro tip: If you’re changing colors, cut the old yarn after you’ve pulled the new color through the last loop—this minimizes waste.
Step 3: Weave in Two Directions
Never just go back and forth in one line. That’s a recipe for unraveling. Instead, weave your tail in one direction for 2–3 inches, then turn and weave it back in the opposite direction through a different row of stitches. This locks it in place like a double knot.
Step 4: Hide It in Plain Sight
Weave ends along the back of your work, following the natural path of the stitches. For single crochet, go under the vertical bars. For double crochet, follow the “V” shapes. The goal? Make it disappear.
Bonus Trick for Color Changes:
If you’re switching colors in a stripe pattern, weave the new color’s tail into the previous color’s stitches. That way, both ends are hidden within the same color zone—no visible threads peeking through.
What NOT to Do:
- Don’t tie knots. Knots create lumps and can come undone over time.
- Don’t weave only 1 inch. That’s not enough to hold.
- Don’t ignore ends on the edges. Those are the ones that snag first!
And here’s a game-changer: weave as you go. Instead of waiting until the end, tuck in a few ends every time you change yarn or finish a motif. It turns a daunting task into a quick 2-minute habit.
Your finished piece will feel smoother, look cleaner, and last longer—all because you took those extra seconds to hide your ends properly.
Blocking: The Secret Weapon That Makes Your Work Shine
Now that your ends are tucked away, let’s talk about the real magic trick: blocking.
Blocking is the process of shaping and setting your finished crochet piece using moisture and gentle tension. It’s what transforms a lopsided granny square into a perfect hexagon. It’s why your lace shawl looks like it’s floating instead of hanging limp.
You might think, “But my blanket looks fine already!” Maybe. But blocking? It’s the difference between a homemade gift and something that looks like it came from a boutique.
Here’s the science behind it: Crochet stitches are made of fibers—cotton, wool, acrylic—that stretch, curl, or shrink depending on how they’re handled. Blocking resets those fibers, letting them settle into their ideal shape.
Think of it like ironing a shirt. You wouldn’t wear a wrinkled shirt to a job interview, right? Same logic. Your crochet deserves the same care.
There are three main types of blocking, and the one you choose depends on your yarn:
- Spray Blocking (Best for acrylic): Lightly mist your piece with water, pin it into shape, and let it dry. Gentle, safe, and perfect for synthetics.
- Wet Blocking (Best for wool, cotton, linen): Soak your piece in lukewarm water for 15–20 minutes, gently squeeze out excess water (don’t wring!), then pin it out on a towel or blocking mat.
- Steam Blocking (Best for natural fibers like wool or alpaca): Hold a steam iron a few inches above the fabric—don’t touch it!—and let the steam relax the fibers. Then pin into place.
Pro Tip: Always use rust-proof T-pins or blocking pins. Regular pins can stain your yarn. And use a flat surface—like a carpet, foam board, or even a clean mattress.
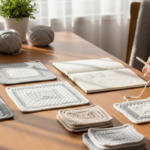
How to Block a Simple Project:
- Lay your piece flat on a towel.
- Gently stretch it into shape.
- Pin every 4–6 inches along the edges.
- For lace, pin out the openwork to reveal the pattern.
- Let it dry completely—this can take 24–48 hours.
Real-Life Example:
Sarah, a crocheter from Ohio, made a delicate lace shawl for her wedding. She didn’t block it at first. It looked like a crumpled napkin. After wet blocking, it opened up into a flowing, elegant piece that matched her dress perfectly. She still gets compliments on it—five years later.
Blocking isn’t optional. It’s transformative.
Common Blocking Mistakes (And How to Avoid Them)
Even experienced crocheters mess up blocking sometimes. Here are the top three mistakes—and how to sidestep them:
Mistake #1: Blocking Too Aggressively
You want your piece to look perfect, so you stretch it like taffy. Big mistake. Over-stretching can distort your stitch pattern, especially in cotton or bamboo yarns. Let the fabric relax into shape—not force it.
Mistake #2: Skipping the Drying Time
I get it. You’re excited. You want to wear that scarf now. But if you remove your pins before the piece is 100% dry, it will snap back to its original shape. Patience is your friend. Set a reminder on your phone: “Check shawl at 24 hours.”
Mistake #3: Using the Wrong Surface
Blocking on a fluffy carpet? Bad idea. The fibers can stick. A hardwood floor? Too hard. Your best bet: a foam puzzle mat (the kind used for kids’ playrooms) or a clean, dry bed. These give you a soft, even surface to pin into.
Bonus Tip for Garments:
If you’re blocking a sweater or cardigan, measure your pieces before you start. Pin them to match the pattern’s dimensions. That way, your sleeves won’t be too short or the body too wide. A measuring tape is your new best friend.
And here’s something few people mention: you can block after washing. In fact, you should! Every time you wash your handmade item, give it a light refresh with spray blocking. It keeps it looking fresh, just like you did the first time.
Blocking isn’t a one-time thing. It’s a ritual of care.
The Ripple Effect: How Finishing Elevates Your Whole Craft
Here’s the beautiful thing about mastering finishing: it changes how you see your work.
Before you learn to weave ends and block, you might think, “It’s handmade—that’s enough.” But once you see the difference, you’ll never go back.
You’ll start noticing the subtle details: how a perfectly blocked edge makes a blanket look like it was designed by a professional. How invisible ends make a gift feel thoughtful, not rushed. How your confidence grows—not because you made more pieces, but because you made better ones.
And here’s the unexpected bonus: people notice.
A friend who received a blocked, end-free baby blanket wrote to me: “I didn’t realize how much work went into this until I saw how clean it looked. I cried when I opened it.” That’s the power of finishing.
It turns your hobby into a legacy.
Think about your favorite handmade item—maybe a scarf from your grandma, or a blanket your best friend made you. Chances are, it’s not the pattern that moved you. It’s the care. The attention. The fact that someone chose to do it right.
That’s what you’re offering when you finish your work.
You’re not just giving yarn and stitches. You’re giving time. Thoughtfulness. Love.
So the next time you’re tempted to skip weaving in ends because you’re tired… or skip blocking because it “looks fine”… pause.
Ask yourself: Do I want this to be just another project—or do I want it to be remembered?
Your Finishing Toolkit: What You Need (And What You Don’t)
You don’t need fancy gear to finish well. Here’s your minimalist, budget-friendly kit:
✅ Yarn needle (large-eye, blunt) – $2 at any craft store
✅ T-pins or blocking pins – $5 for a pack of 50
✅ Measuring tape – You probably already have one
✅ Rust-proof pins – Avoid regular pins; they’ll stain
✅ Clean towel or blocking mat – A bed or foam mat works
✅ Spray bottle – For spray blocking (reuse an old water bottle!)
That’s it.
You don’t need a blocking board. You don’t need steamers or heat guns. You don’t need to spend $50 on “crochet finishing tools.”
Just patience. A little time. And the willingness to do the quiet, unseen work.
And if you’re feeling overwhelmed? Start small. Block one coaster. Weave in the ends on a dishcloth. Practice on something small, low-stakes. Then celebrate how much better it looks.
Progress, not perfection.
Final Thought: Finishing Is an Act of Love
Crochet isn’t just about counting stitches or following patterns.
It’s about slowing down. About choosing care over convenience. About turning hours of quiet focus into something beautiful someone else can hold, hug, or wrap around their shoulders on a cold night.
Finishing isn’t the last step.
It’s the heart of the process.
When you weave in an end, you’re saying: I didn’t start this just to quit.
When you block a piece, you’re saying: This matters enough to get it right.
And when you hand that finished item to someone? You’re not just giving them a blanket or a hat.
You’re giving them a piece of your time. Your patience. Your quiet devotion.
So go ahead—grab that yarn needle. Pin those edges. Take a deep breath. And finish it.
Not because you have to.
But because you deserve to.
And so does whoever gets to hold what you’ve made.
Your Turn:
Have you ever skipped finishing—and regretted it later? Or maybe you just discovered how powerful blocking can be? Share your story in the comments below. I’d love to hear how finishing changed your crochet journey. And if you found this helpful, don’t forget to share it with a friend who’s still leaving ends hanging. Let’s turn more handmade items into heirlooms—together. 💛

Luiza Santos is a passionate crochet and knitting enthusiast who finds joy in transforming simple yarn into meaningful, handmade creations. With a deep love for texture, color, and craftsmanship, she believes every stitch carries a story. Luiza brings warmth, creativity, and years of hands-on experience to everything she makes, inspiring others to discover the beauty of fiber arts.