You spent hours—maybe even days—crocheting that perfect blanket, that whimsical amigurumi, that intricate lace shawl. You’ve chosen the yarn with care, matched the colors just right, and finished every stitch with love. But when you snap a quick photo on your phone and post it online… it just doesn’t pop. The colors look dull. The texture is lost. The lighting makes it look flat. And suddenly, all that hard work feels invisible.
Here’s the truth: your crochet deserves to be seen the way you see it. Not as a blurry, shadowy lump in the corner of your living room—but as the beautiful, handmade masterpiece it is. That’s where good photography comes in. You don’t need a fancy camera or a professional studio. You just need to know how to see your work through the lens—and how to guide the light, the background, and the angle to tell its story.
In this guide, we’re diving into the simple, powerful techniques that will transform your crochet photos from “meh” to “WOW.” Whether you’re selling your pieces on Etsy, sharing them on Instagram, or just documenting your creative journey, these tips will help your projects stand out, attract attention, and truly reflect the heart behind them. No technical jargon. No expensive gear. Just real, practical advice you can start using today.
Lighting: Your Secret Weapon (No Studio Needed)
Let’s get real: lighting is everything in photography. It’s the difference between a photo that makes people stop scrolling and one that gets ignored.
Most of us take crochet photos right where we crochet—on the couch, at the kitchen table, under a ceiling light. But overhead lights? They cast harsh shadows, wash out colors, and flatten texture. Imagine trying to see the delicate stitches of a lace doily under a bright fluorescent bulb. It’s like trying to admire a sunset through a foggy window.
The secret? Natural light. Specifically, soft, diffused natural light.
Here’s how to find it:
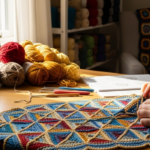
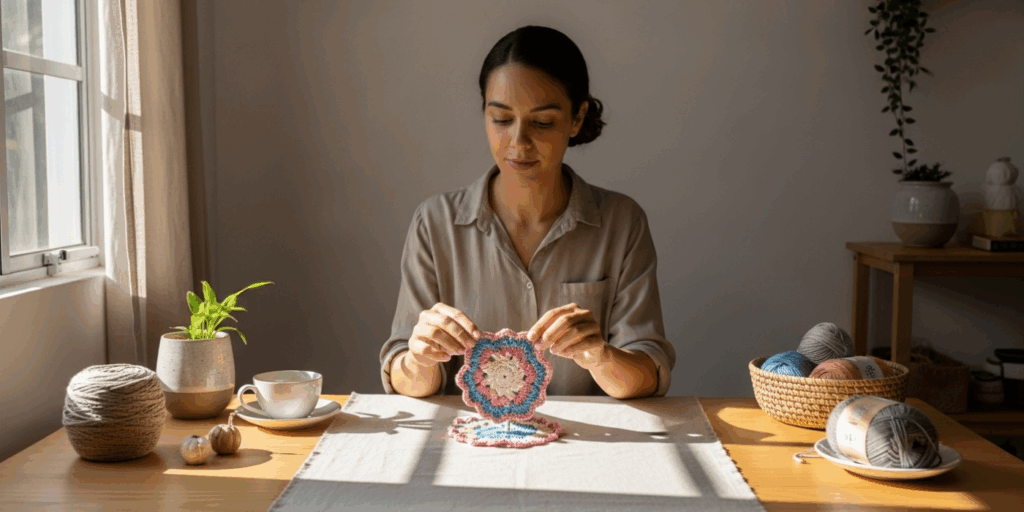
- Early morning or late afternoon (think golden hour) is ideal. The sun is low, casting a warm, gentle glow.
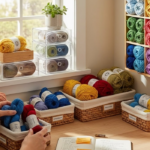
- Near a window, but not in direct sunlight. Direct sun creates harsh highlights and deep shadows. Instead, position your project where the light is filtered—like behind a sheer curtain, or on a cloudy day.
- Use a white sheet or foam board as a reflector. Place it opposite the window to bounce light back onto the shadowed side of your piece. It’s like giving your crochet a little hug of brightness.
I remember the first time I tried this with my granny square blanket. I’d been photographing it under my desk lamp for weeks—dark corners, muddy colors. One morning, I moved it to the window, draped a white towel over the blinds, and snapped a photo. The difference was staggering. The colors came alive. The stitches looked like tiny sculptures. People started asking, “Where did you buy this?”—not realizing I’d made it myself.
You don’t need a $1,000 lightbox. Just a window, a white sheet, and patience. Natural light doesn’t just make your project look better—it makes it feel real. And people connect with real.
Backgrounds and Composition: Less Is More
Now that you’ve got great light, what’s behind your crochet? If you answered “my messy couch,” you’re not alone. But a cluttered background distracts from your masterpiece.
Think of your crochet as the star of a movie. Would you want it filmed in front of a busy street? A pile of laundry? A screaming toddler? Probably not. The same applies to photos.
Simple, neutral backgrounds win.
Try:
- A clean white or light gray wall
- A wooden cutting board or plain linen cloth
- A large sheet of paper or cardstock (you can buy affordable ones at craft stores)
- Even a bathroom tile floor (yes, really—many creators use this!)
Avoid busy patterns, bright colors, or anything that competes for attention. You want the viewer’s eyes to land on your crochet—and stay there.
But here’s the next level: composition.
Don’t just center your blanket and call it a day. Play with angles and space.
- Show texture up close: Zoom in on a single stitch pattern. Let the viewer see the loops, the bumps, the tiny details.
- Show scale: Place your finished piece next to something familiar—a coffee mug, a pair of hands, a cat curled up on it. Suddenly, people understand how big, soft, or intricate it is.
- Use negative space: Leave room around your project. Don’t cram it into the frame. Let it breathe. It feels more elegant, more intentional.
I once saw a photo of a tiny amigurumi octopus sitting alone on a white wooden table, with just a single yarn strand trailing off the edge. No caption. No filter. Just that one image—and it went viral. Why? Because it told a story. It invited you in.
Your background isn’t just a surface—it’s a stage. And your crochet deserves the spotlight.
Angles and Perspectives: Show Off the Details
Here’s a little secret: there’s no single “right” way to photograph crochet. The magic is in showing different sides, textures, and moods.
Let’s break it down:
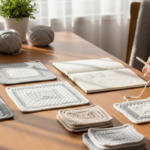
1. The Flat Lay (Top-Down)
Perfect for blankets, scarves, or doilies. Lay your piece flat on a clean surface. Shoot straight down with your phone or camera. This view highlights symmetry, patterns, and color layouts. Bonus: add a few scattered yarn ends, a crochet hook, or a pair of scissors nearby for context. It feels personal, like you’re showing someone your workspace.
2. The Drape Shot
For shawls, cowls, or garments, drape your piece over a chair, a ladder, or even a hanger. Let it fall naturally. This shows flow, drape, and how it might look when worn. I once photographed a lace shawl draped over the back of my wooden rocking chair. The way the light filtered through the holes made it look like spun moonlight. People asked if it was silk.
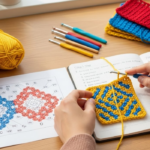
3. The Detail Close-Up
Zoom in on a single stitch pattern. A popcorn stitch. A shell. A bobble. These tiny moments are what make handmade special. Use your phone’s macro mode (or get close—your lens can handle it). This isn’t just pretty—it’s proof of your skill.
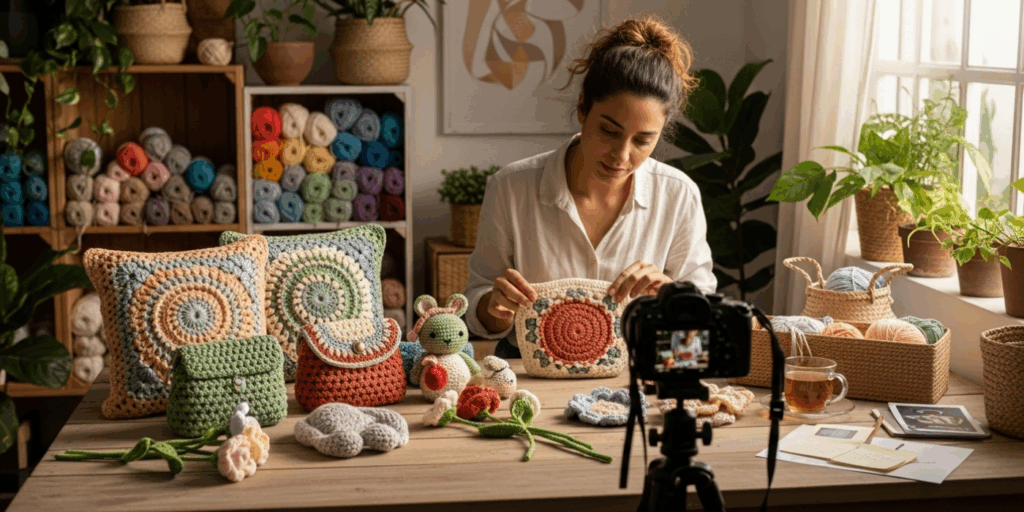
4. The Lifestyle Shot
Show your crochet in use. A hat on someone’s head. A blanket on a cozy bed. A bag carried on the shoulder. This helps people imagine themselves with your creation. It turns a product into a dream.
Pro tip: Don’t take just one photo. Take ten. Try different angles. Move your project around. See what feels right. You’ll be surprised which one people love the most.
And here’s the kicker: people don’t buy crochet because it’s pretty. They buy it because they can feel the love in it. Showing the details, the texture, the way it moves—that’s how you connect emotionally.
Editing: The Gentle Touch That Makes All the Difference
You’ve got great light, a clean background, and the perfect angle. Now what? A little editing. Not to change your project—but to reveal it.
Let me be clear: you don’t need Photoshop. Your phone’s built-in editor is enough.
Here’s what to tweak—lightly:
- Brightness: If your photo looks a little dark, nudge it up 5–10%.
- Contrast: Increase slightly to make stitches “pop.” But don’t overdo it—you want softness, not harshness.
- Saturation: If colors look faded, gently boost them. A crochet blanket in dusty pink shouldn’t look like mud.
- Sharpness: A small increase helps define stitches.
- White balance: If your photo looks too yellow or blue, use the “temperature” slider to make it neutral. (If it looks like your blanket is glowing orange, you’re in a warm light—cool it down a bit.)
I used to think editing was cheating. Then I realized: photographers have been editing since the darkroom. It’s not about making something fake—it’s about making something true to life.
Avoid filters that add vignettes, grain, or heavy color tints. They make your work look like everyone else’s. You want your crochet to look like your crochet—not a preset.
And here’s a pro tip: save your original photo. Always. You can always go back. And don’t edit on your phone screen alone—view it on a computer or tablet. Colors can look different on smaller screens.
Editing is like fluffing a pillow before you sit on it. You’re not changing the pillow—you’re just making it look its best.
The Little Things That Make a Big Impact
Now that you’ve nailed the big stuff, let’s talk about the tiny details that turn good photos into unforgettable ones.
1. Keep it clean.
Before you photograph, brush off any loose fibers. Wipe dust off your hook. Tuck in loose ends. A single stray yarn strand can distract from an otherwise perfect shot.
2. Use props—but wisely.
A teacup. A book. A plant. A wooden spoon. These add warmth and life. But don’t overcrowd. One or two props max. Let your crochet be the hero.
3. Shoot in portrait mode.
Most social platforms (Instagram, Pinterest, Etsy) favor vertical images. Shoot with your phone upright. It fills the screen better and looks more intentional.
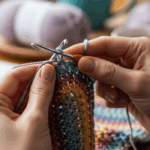
4. Don’t forget the hands.
Sometimes, showing your hands holding or working on the piece adds humanity. It says, “I made this. With my hands. With care.” It’s powerful.
5. Be consistent.
If you’re selling items, use the same background, lighting style, and editing tone across all your photos. It builds a recognizable brand. People start to say, “Oh, that’s your style.”
I once followed a small crochet shop on Instagram. Every photo looked like it was taken in the same sunlit corner, with the same white linen backdrop and soft shadows. I didn’t even know the artist’s name—but I remembered her work. That’s branding. That’s power.
Your Crochet Has a Story. Let the Photos Tell It.
Think about why you crochet. Maybe it’s for the rhythm of the hook. The quiet focus. The way a ball of yarn transforms into something warm and beautiful. That’s not just craft—it’s care.
Photography isn’t about making your project look “perfect.” It’s about making it look felt.
When someone sees your photo, they shouldn’t just see a blanket. They should feel the hours spent. The patience. The love poured into every stitch.
That’s what makes people pause. That’s what makes them comment, share, and buy.
You don’t need to be a photographer. You just need to be present. To notice the way the light catches the edge of a scarf. To see the quiet beauty in a single shell stitch. To understand that your work matters—and deserves to be seen clearly.
So next time you finish a piece, don’t rush to snap a quick shot. Take a breath. Move it to the window. Wait for the golden hour. Try a different angle. Edit gently. Let your work breathe.
Because your crochet isn’t just something you made.
It’s something you gave.
And the world needs to see it.
Final Thought: Start Today—One Photo at a Time
You don’t need to overhaul your whole setup. You don’t need to wait for “the perfect day.” Right now, as you read this, go to your next finished piece. Move it near a window. Take one photo. Just one.
Then ask yourself: Does this look like the love I put into it?
If not, try again tomorrow. And the day after that.
Every photo you take is a step toward being seen. Toward connecting with others who value handmade beauty. Toward turning your passion into something more than a hobby—into a story that inspires.
So go ahead. Set up your little corner. Grab your phone. Let the light in.
Your crochet is waiting.
And so are the people who will fall in love with it.
What’s your favorite crochet project to photograph? Share a photo in the comments—I’d love to see how you capture your creations! And if this helped you, don’t forget to share it with another maker who needs a little light. 🌞🧶

Luiza Santos is a passionate crochet and knitting enthusiast who finds joy in transforming simple yarn into meaningful, handmade creations. With a deep love for texture, color, and craftsmanship, she believes every stitch carries a story. Luiza brings warmth, creativity, and years of hands-on experience to everything she makes, inspiring others to discover the beauty of fiber arts.