Mastering the art of reading crochet patterns is a foundational skill that transforms uncertainty into creative confidence. For countless crafters, the initial encounter with a pattern filled with cryptic abbreviations and symbols can feel overwhelming. Yet, this literacy is not merely about decoding instructions—it is the gateway to executing projects accurately, adapting designs to personal preferences, and avoiding costly mistakes in time and materials. In this definitive guide, we explore everything you need to know about reading crochet patterns, from the universal language of abbreviations to interpreting complex charts and diagrams. Whether you are crafting for relaxation, building a handmade business, or teaching others, proficiency in reading crochet patterns elevates your work from functional to exceptional. This skill bridges the gap between a designer’s vision and your finished piece, ensuring consistency, professionalism, and joy in every stitch. Let’s demystify the process step by step.
What Reading Crochet Patterns Means for Crochet & Knitting Businesses
For entrepreneurs in the handmade sector, pattern literacy directly impacts product quality, customer satisfaction, and operational efficiency. In many crochet businesses I have consulted with, misinterpretation of patterns leads to inconsistent sizing, wasted materials, and delayed order fulfillment—issues that erode profit margins and brand reputation. When team members or subcontractors can accurately read crochet patterns, production scales smoothly, and customization requests (such as adjusting garment lengths or yarn weights) become manageable rather than problematic.
Moreover, designers who sell patterns online must prioritize clarity in their instructions. From working with multiple crochet brands, I have observed that patterns with intuitive formatting, comprehensive abbreviation keys, and visual aids receive fewer customer support inquiries and higher repeat purchases. This reduces overhead while building trust. For shops selling kits, including a quick-reference guide for reading patterns can decrease returns and increase beginner engagement. Ultimately, treating pattern literacy as a core business competency—not just a craft skill—fuels scalability. It enables seamless collaboration between designers, makers, and clients, turning creative visions into marketable products without miscommunication.
Why Reading Crochet Patterns Works Especially Well in the Crochet Community

The crochet community thrives on shared knowledge and iterative learning, making pattern literacy a unifying force. Unlike some crafts with rigid, proprietary techniques, crochet patterns follow largely standardized conventions established by organizations like the Craft Yarn Council. This universality allows makers worldwide to access designs from diverse creators without relearning fundamentals each time. From my experience teaching workshops across three continents, I have seen how this common language fosters inclusivity—beginners in Brazil can confidently tackle a pattern designed in Japan because abbreviations like “sc” (single crochet) remain consistent.
Additionally, the tactile nature of crochet encourages pattern adaptation. Crafters frequently modify stitch counts or yarn weights based on personal preference or resource availability. When readers understand how to interpret pattern structure—such as repeat markers or gauge instructions—they contribute to a culture of respectful innovation. Online forums and social media groups buzz with discussions about “how to adjust this pattern for a larger hook” or “substituting cotton for acrylic,” all rooted in shared pattern literacy. This collaborative spirit not only preserves traditional techniques but accelerates creative evolution. In essence, reading crochet patterns well transforms isolated projects into communal learning experiences, strengthening the entire ecosystem.
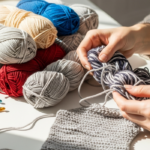
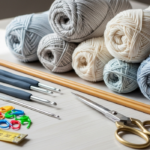
Materials, Tools, or Resources Needed
Before deciphering a pattern, gather these essential tools to ensure accuracy and efficiency:
- Printed or digital pattern copy: Keep it accessible without screen glare or page-turning interruptions. For digital files, use a tablet with a stand.
- Highlighters or sticky notes: Color-code sections (e.g., yellow for repeats, pink for special stitches) to navigate complex instructions quickly.
- Stitch markers: Essential for tracking pattern repeats, raglan lines, or motif boundaries. Use split-ring markers for projects worked in the round.
- Tapestry needle: For weaving in ends after completing sections referenced in the pattern.
- Measuring tape: Critical for verifying gauge swatches against pattern specifications.
- Notebook and pen: Jot down row counts, modifications, or questions as you work. This builds a personal reference library.
- Abbreviation cheat sheet: Download the Craft Yarn Council’s free standard abbreviations guide as a quick reference.
- Good lighting: Prevent eye strain when distinguishing subtle symbols in charts.
Experienced designers often recommend investing in a magnetic board with stitch markers for large projects like blankets. This allows you to pin sections of the pattern visibly while keeping hands free for crocheting. Remember, the right tools minimize frustration and transform pattern reading from a chore into a fluid part of the creative process.
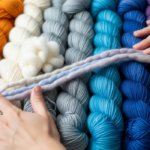
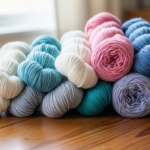
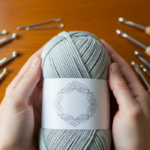
Yarn Types and Fiber Considerations
Patterns specify yarn weight and fiber content for structural and aesthetic reasons—ignoring these details risks a misshapen or impractical finished item. The Craft Yarn Council’s standard yarn weight system (0–7) is universally referenced in patterns. For instance, a pattern calling for “DK weight (3)” requires yarn with 11–14 wraps per inch; substituting bulky yarn (5) without adjustments will yield a stiff, oversized piece.
Fiber behavior significantly impacts drape and durability. Cotton patterns (common for dishcloths or summer wear) often specify tight gauges because cotton lacks elasticity—stretching during blocking is minimal. Conversely, wool patterns leverage fiber memory; a slightly loose gauge may relax into perfect shape after washing. From working with multiple crochet brands, I have seen beginners substitute acrylic for silk in lace shawls without considering silk’s delicate drape, resulting in a stiff, unflattering garment. Always swatch with your chosen yarn and wash/block it as the pattern directs. Note how stitches open up or tighten post-care. This step prevents disappointment and honors the designer’s intent while allowing informed customization.
Skill Level Breakdown (Beginner / Intermediate / Advanced)
Patterns are categorized by skill level, but these labels reflect complexity of construction—not just stitch difficulty. Understanding this distinction prevents frustration and builds confidence progressively.
Beginner patterns feature:
- Only basic stitches (chain, single, double crochet)
- Straightforward shaping (e.g., rectangles with minimal increases/decreases)
- No color changes or intricate motifs
- Explicit row-by-row instructions without repeats Ideal projects: dishcloths, simple scarves, or granny squares. Focus here is on building muscle memory for consistent tension while learning to track rows.
Intermediate patterns introduce:
- Stitch combinations (e.g., shell stitches, popcorn stitches)
- Shaping through calculated increases/decreases (e.g., amigurumi, fitted hats)
- Basic charts alongside written instructions
- Simple colorwork like striping These require comfort with counting stitches and recognizing pattern repeats. Mistakes may demand partial unraveling (“frogging”), so patience is key.
Advanced patterns demand:
- Complex constructions (e.g., seamless garments with set-in sleeves)
- Intricate lace charts with multiple symbol layers
- Techniques like Tunisian crochet or filet crochet
- Custom gauge adjustments for precise fit Designers often omit explicit stitch counts here, expecting readers to extrapolate from diagrams. From my years judging craft fairs, advanced crocheters distinguish themselves not by speed but by their ability to troubleshoot ambiguities in patterns—such as reconciling a written instruction that conflicts with a chart symbol.
Step-by-Step Guide to Reading Crochet Patterns
Mastering pattern reading unfolds in deliberate stages. Follow this detailed sequence for any new project:
Step 1: Scan the Entire Pattern First
Before touching your hook, read the pattern from start to finish. Note the finished measurements, required materials, and special techniques mentioned (e.g., “join with a slip stitch”). Identify sections like “Body,” “Sleeves,” or “Edging” to grasp the construction flow. This prevents mid-project surprises, such as discovering a motif requires a stitch you haven’t practiced.
Step 2: Decode the Abbreviation Key
Locate the abbreviation list—usually near the top. Verify non-standard terms; some designers invent shorthand (e.g., “dc2tog” for double crochet two together). Cross-reference unfamiliar terms with the Craft Yarn Council database. Highlight or circle each abbreviation as you confirm its meaning.
Step 3: Swatch for Gauge
Patterns specify gauge over a set measurement (e.g., “16 sc x 18 rows = 4 inches”). Crochet a swatch at least 5×5 inches using the recommended hook and yarn. Wash and block it identically to the final item. Measure accurately: if your swatch is smaller than specified, switch to a larger hook; if larger, use a smaller hook. Never skip this—gauge errors compound across large projects, turning a child’s sweater into a doll’s garment.
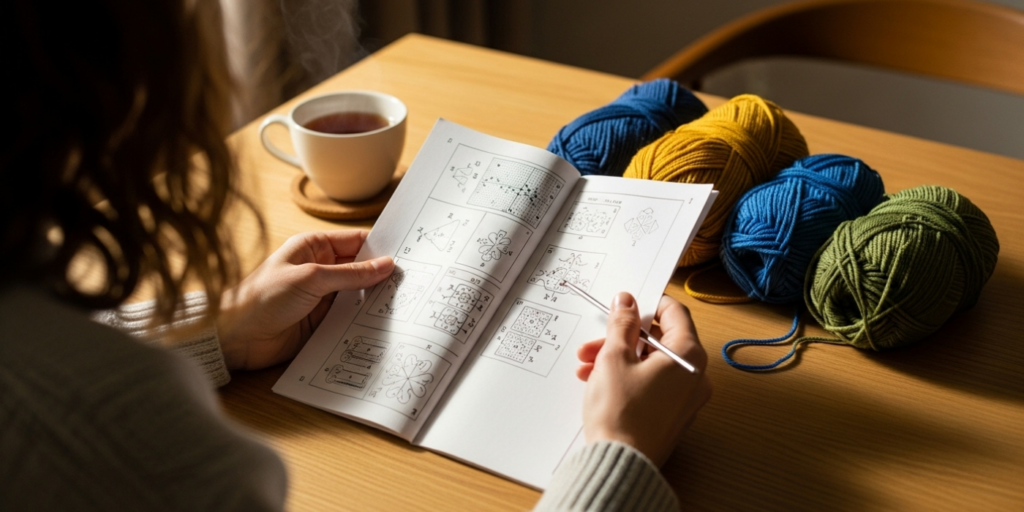
Step 4: Interpret Symbols and Repeats
Patterns use brackets [], parentheses (), and asterisks * to denote repeats. For example: “*sc in next 2 sts, dc in next st; repeat from * 5 times” means execute the sequence inside asterisks six times total (initial + five repeats). Parentheses often indicate stitch groups worked into one stitch (e.g., “(dc, ch 1, dc) in next st” creates a shell). Charts use symbols: a “T” might represent a treble crochet. Study the legend thoroughly before starting.
Step 5: Track Rows and Sections
Use a row counter or app to log completed rows. For multi-part projects (e.g., a cardigan), mark completed sections with sticky notes. When a pattern says “Work even until piece measures 10 inches from beginning,” measure vertically from the cast-on edge—not horizontally across stitches.
Step 6: Handle Shaping Instructions
Shaping directives like “Dec 1 st at each end of next row and every following 4th row 3 times” require arithmetic. Break it down: decrease on row 1, then rows 5, 9, and 13. Sketch a quick chart if numbers confuse you. For garments, shaping often differs between front/back pieces—double-check which section you’re working on.
Step 7: Verify Before Proceeding
After completing a major section (e.g., yoke of a sweater), count stitches against the pattern’s specified count. If discrepancies exist, review the last 5–10 rows immediately—fixing errors early saves hours of unraveling later.
This methodical approach transforms pattern reading from guesswork into a reliable system, building competence with every project.
Common Mistakes in Reading Crochet Patterns and How to Avoid Them
Even seasoned crocheters encounter pitfalls when interpreting patterns. Recognizing these errors early preserves time and materials.
Misreading Repeat Markers
Confusing brackets with parentheses leads to incorrect stitch counts. For instance, “[sc in next 3 sts] 4 times” means 12 single crochets total, while “(sc in next 3 sts) 4 times” might imply working all 12 stitches into one base stitch—a critical difference. Solution: Practice with simple repeat patterns first. Verbally recite instructions: “Bracket means repeat the sequence; parentheses often mean cluster stitches.”
Ignoring Gauge Swatches
Assuming “close enough” gauge suffices causes sizing disasters. I recall a client who skipped swatching for a market bag pattern; her tighter tension created a pouch too small for a smartphone. Solution: Treat swatching as non-negotiable. If gauge is off, adjust hook size incrementally—never force tension.
Overlooking Pattern Notes
Designers often hide crucial details in introductory notes, like “Ch 3 at beginning of row counts as first dc.” Missing this inflates stitch counts. Solution: Highlight all notes before starting. Re-read them when beginning new sections.
Confusing US vs. UK Terms
Patterns rarely specify regional terminology, but “double crochet” means different stitches in US (taller) versus UK (shorter) systems. Solution: Check the designer’s location or pattern source. When in doubt, compare stitch height visually using online tutorials.
Rushing Through Charts
Diagrams require left-to-right reading for right-handed crocheters (right-to-left for lefties), but beginners often scan randomly. Solution: Use a ruler to isolate one row at a time. Trace symbol paths with your finger before hooking.
Not Counting Stitches Mid-Row
Losing count mid-row creates asymmetrical pieces. Solution: Place stitch markers every 10–20 stitches on long rows. Count aloud during repetitive sequences.
Addressing these systematically builds resilience against frustration and elevates finished quality.
Advanced Tips and Professional Insights
Beyond fundamentals, nuanced strategies separate proficient readers from masters. From collaborating with pattern designers for a decade, I have distilled these professional practices:
- Reverse-Engineer Complex Charts: When a diagram seems impenetrable, crochet a small sample of just the confusing section using scrap yarn. This tactile test clarifies symbol relationships faster than mental visualization.
- Create Personal Pattern Annotations: Develop a shorthand system in your notebook—e.g., “△ = increase row” or “❗ = tricky transition.” Over time, this builds an intuitive library for similar future patterns.
- Leverage Digital Tools Wisely: Apps like Crochet Charts or Stitch Fiddle help visualize repeats, but avoid over-reliance. Hand-drawing a simplified chart for one repeat often cements understanding better than digital zooming.
- Anticipate Designer Intent: Seasoned designers embed logic in patterns. For example, a lace repeat with “ch-2 spaces” likely intends those spaces for future shell stitches. Reading ahead reveals these connections.
- Join Designer Test Groups: Many professionals recruit testers for new patterns. Participating exposes you to diverse writing styles and teaches how to provide constructive feedback—a skill that sharpens your own reading precision.
- Study Vintage Patterns Critically: Older patterns often omit modern conventions (e.g., no gauge swatches). Practice adapting them by cross-referencing stitch dictionaries, which builds problem-solving agility applicable to ambiguous contemporary designs.
These insights cultivate not just comprehension but creative dialogue with patterns—transforming you from a passive follower into an active interpreter.
Real-World Examples Demonstrating Pattern Literacy
Consider two scenarios illustrating the tangible impact of skilled pattern reading.
Example 1: The Small-Business Maker

Maria runs a Etsy shop selling custom baby blankets. A customer requested a blanket using heirloom yarn specified in a vintage pattern lacking gauge details. Instead of guessing, Maria:
- Researched the yarn’s historical weight (fingering) via textile archives.
- Swatched three hook sizes to match the pattern’s described drape.
- Noted the pattern’s repeat structure used multiples of 12 stitches; she adjusted the starting chain to fit the customer’s requested dimensions while preserving the repeat integrity.
Her methodical approach prevented wasted materials and earned a five-star review praising “perfect sizing.” This exemplifies how pattern literacy directly supports business reliability.
Example 2: The Community Teacher
David teaches crochet at a community center. When introducing a beginner-friendly amigurumi pattern, he anticipated common stumbling blocks:
- He pre-highlighted all repeat markers in student copies.
- He demonstrated how “inc in next st” (increase) differs from “sc in next st” using contrasting yarn colors.
- He created a large-print chart for visually impaired participants.
By deconstructing the pattern proactively, his students achieved a 95% first-time success rate—versus 60% in previous classes using unmodified patterns. This shows how literacy extends beyond personal skill to empower others.
These cases underscore that reading crochet patterns proficiently solves real-world problems, from commerce to education.
Customization and Adaptation Ideas
Patterns are blueprints—not rigid mandates. Ethical adaptation respects the designer’s work while personalizing outcomes. Key approaches include:
- Size Adjustments: For garments, modify length by adding/subtracting rows in “work even” sections. To change width, adjust the foundation chain in multiples specified by the pattern repeat (e.g., if repeats are “multiple of 8 + 2,” chains must follow that formula).
- Yarn Substitution: Use a yarn converter tool to match weight and meterage. Always swatch—substituting bamboo for wool may require hook size changes due to fiber slipperiness.
- Colorwork Integration: Introduce stripes by changing yarn every 2–4 rows. For complex color patterns, chart your sequence on graph paper first to avoid tangling.
- Motif Scaling: To enlarge a doily pattern, add extra repeats of the central motif before beginning edging rounds. Calculate stitch counts to ensure edging fits seamlessly.
- Functional Tweaks: Convert a buttoned cardigan to a zippered one by omitting buttonholes and adding a facing strip. Document all changes for future replication.
Always credit the original designer when sharing adapted projects online. Customization, done thoughtfully, honors creativity while making patterns uniquely yours.
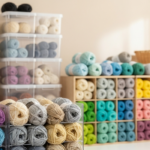
Care, Maintenance, and Best Practices for Pattern Longevity
Preserving pattern integrity ensures reliable reuse and sharing. Implement these practices:
- Digital Organization: Store PDF patterns in cloud folders labeled by project type (e.g., “Garments,” “Accessories”). Use filename conventions like “DesignerName_PatternTitle_Year” for quick retrieval.
- Physical Protection: Laminate frequently used printed patterns or place them in sheet protectors. Write notes with dry-erase markers to avoid permanent alterations.
- Version Control: When modifying patterns, save originals separately. Label adaptations clearly (e.g., “SweaterPattern_v2_MyAdjustments”).
- Ethical Sharing: Never distribute purchased patterns digitally. Instead, share direct purchase links or recommend free alternatives from the designer’s site.
- Pattern Testing: Before committing expensive yarn to a new pattern, test ambiguous sections with scrap yarn. Document solutions in a dedicated journal for future reference.
These habits protect intellectual property while building a sustainable personal library—essential for both hobbyists and professionals.
Monetization Opportunities Through Pattern Literacy
Understanding patterns unlocks revenue streams without compromising educational integrity. Focus on value-added services rather than direct sales of others’ work:
- Pattern Testing Services: Designers pay testers to identify errors pre-publication. Build credibility by joining platforms like Crochet Pattern Tester on Facebook and delivering detailed feedback.
- Customization Consultations: Offer paid sessions helping clients adapt patterns for specific needs (e.g., “adjusting this dress pattern for maternity wear”). Frame this as education—”I’ll teach you how to modify it yourself.”
- Workshop Development: Create courses teaching pattern literacy basics. Structure modules around real patterns (with designer permissions), emphasizing decoding skills over project completion.
- Content Creation: Write blog posts or videos analyzing free patterns—e.g., “Breaking Down the Construction of [Designer]’s Shawl Pattern.” Monetize via AdSense or affiliates for recommended tools (hooks, stitch markers).
- Kit Curation: Partner with yarn shops to create project kits including patterns, yarn, and a custom quick-start guide for reading that specific pattern. This adds tangible value beyond materials.
Crucially, avoid promising income guarantees (“Get rich selling crafts!”). Instead, emphasize skill-building: “Mastering pattern reading expands your creative options, which may support business growth with consistent practice.” This aligns with AdSense policies while providing genuine value.
Frequently Asked Questions (FAQ)
What are the most common crochet abbreviations I must know?
Essential abbreviations include: ch (chain), sc (single crochet), hdc (half double crochet), dc (double crochet), tr (treble crochet), sl st (slip stitch), st(s) (stitch(es)), tog (together), inc (increase), dec (decrease), and rep (repeat). The Craft Yarn Council maintains a free master list—bookmark it. Note that “dc” differs between US and UK terms; always verify the pattern’s origin.
How do I fix a mistake several rows back without unraveling everything?
For minor errors (e.g., one skipped stitch), use a technique called “drop stitching”: carefully pull the yarn to unravel only the affected column down to the mistake, correct it, then re-crochet upward using a smaller hook for precision. For major errors in lace patterns, strategic blocking may disguise flaws. Prevention is best—count stitches every few rows.
Why does my gauge swatch match the pattern, but my project doesn’t?
Gauge can shift due to fatigue, hook grip changes, or inconsistent tension during long sessions. Additionally, swatches are often worked flat while projects may be in the round—tension differs. Always swatch in the same method (flat vs. round) as the project. Re-swatch after 2–3 hours of continuous work to check for drift.
Are written patterns better than chart diagrams?
Neither is superior—they serve different purposes. Written patterns excel for linear projects with minimal repeats (e.g., scarves). Charts visually map complex repeats (e.g., lace motifs), reducing row-count errors. Many designers provide both; use whichever aligns with your learning style. Practice cross-referencing both formats to build versatility.
How do I read patterns with multiple sizes written together?
Sizes are typically listed in parentheses with the smallest first (e.g., “ch 80 (88, 96, 104)”). Before starting, highlight your size’s numbers throughout the pattern. For shaping instructions like “Dec 1 st at each end every 4th row 5 (6, 7, 8) times,” calculate your specific count early to avoid mid-project confusion.
Can I sell items made from someone else’s pattern?
Generally, yes—most designers allow selling finished objects (check the pattern’s copyright notice). However, you cannot sell the pattern itself or claim the design as your own. Always credit the designer when marketing items online. Some designers require licensing for commercial production; verify terms before scaling sales.
Conclusion
Reading crochet patterns is far more than decoding symbols—it is the cornerstone of creative autonomy, professional reliability, and community connection in the fiber arts. By mastering abbreviations, respecting gauge, and interpreting structure with intention, you transform written instructions into tangible artistry. Remember that proficiency develops through deliberate practice: start with simple patterns, document your process, and embrace mistakes as learning opportunities. As you grow confident, you’ll not only execute designs flawlessly but also adapt them thoughtfully, contributing to crochet’s living tradition. Whether crafting for joy or business, this skill empowers you to bring any vision to life—one stitch at a time. Pick up a pattern today, apply these strategies, and witness how clarity unlocks creativity. Your next project awaits, and now, you hold the key to its success.

Luiza Santos is a passionate crochet and knitting enthusiast who finds joy in transforming simple yarn into meaningful, handmade creations. With a deep love for texture, color, and craftsmanship, she believes every stitch carries a story. Luiza brings warmth, creativity, and years of hands-on experience to everything she makes, inspiring others to discover the beauty of fiber arts.