Introduction
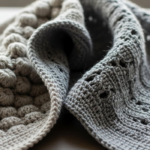
You’ve just finished crocheting (or knitting!) a gorgeous lace shawl, an intricate granny square blanket, or maybe a fitted sweater—but something’s off. The edges curl, the corners won’t lie flat, or the stitches look uneven. Don’t worry: your project isn’t ruined. In fact, it’s just one crucial step away from perfection: blocking.
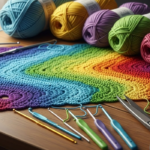
Blocking isn’t just “a nice extra”—it’s the secret weapon of professional fiber artists. It transforms floppy, misshapen fabric into a polished, professional-looking piece that drapes beautifully and showcases your stitchwork exactly as intended. And while basic blocking is straightforward, advanced blocking techniques unlock even greater control—especially for lace, colorwork, garments, and 3D items like amigurumi.
In this guide, you’ll go beyond the basics to master wet blocking, steam blocking, and cold blocking—plus specialized methods for lace shawls, sweaters, granny squares, and delicate fibers like silk or alpaca. You’ll learn how to shape, stretch, and stabilize your projects with precision, ensuring they look their absolute best for years to come. Ready to elevate your finishing game? Let’s dive in.
Why Advanced Blocking Matters (More Than You Think)
")
Many crafters treat blocking as an optional step—something you do “if you have time.” But here’s the truth: blocking can make a mediocre project look excellent—and an excellent project look extraordinary.
Consider lace: without blocking, the openwork stitches collapse into a tangled mess. Once blocked, they bloom into ethereal, symmetrical patterns. Or take a crocheted sweater: blocking evens out tension, aligns seams, and ensures the garment fits as designed.
Advanced blocking takes this further by giving you creative control over shape, drape, elasticity, and longevity. It’s especially vital for:
- Garments that need precise measurements
- Lace or filet crochet that relies on openness
- Join-as-you-go projects where alignment is critical
- Gifts or commissions, where presentation is everything
Think of blocking like ironing a fine suit—it doesn’t change the fabric, but it reveals its true potential. And with the right techniques, you can do far more than just “flatten” your work. You can sculpt it.
Technique #1: Wet Blocking for Maximum Shape Control
Wet blocking is the gold standard for lace, openwork, and plant-based fibers (like cotton, linen, or bamboo). It involves fully saturating your piece, then pinning it into shape while damp.
Step-by-Step Process:
- Soak your project in lukewarm water for 15–20 minutes. Add a bit of no-rinse wool wash if desired (great for softness and scent).
- Gently squeeze out water—never wring! Roll in a clean towel and press to remove excess moisture.
- Lay flat on a blocking mat (or interlocking foam tiles, a spare bed, or carpet covered with a sheet).
- Pin into shape using rust-proof T-pins or blocking wires for smooth curves.
- Let dry completely—this can take 24–72 hours depending on humidity and fiber.
Pro Tips:
- For lace shawls, use blocking wires along the edges for razor-sharp points and smooth curves.
- Measure against your pattern schematic to ensure accurate dimensions.
- Don’t skip the soaking step—just spritzing won’t relax the fibers enough for true shaping.
Benefit: Wet blocking “resets” the yarn memory, allowing you to define every curve and angle permanently. It’s the only method that gives you full control over dramatic shaping.
Technique #2: Steam Blocking for Speed and Delicate Fibers
Steam blocking is faster and gentler—ideal for wool, acrylic, or blended yarns that don’t need full saturation. It’s also perfect when you’re short on time or working with items that shouldn’t get fully wet (like stuffed toys or garments with embellishments).
How to Do It:
- Pin your piece lightly into shape on a heat-safe surface (never use foam—it melts!).
- Hold a garment steamer or steam iron 2–4 inches above the fabric. Never touch the iron directly to the yarn unless the label says it’s safe.
- Steam until the fabric is damp but not soaked.
- Let cool and dry completely while pinned.
Important Notes:
- Test first: Some acrylics can melt under high heat. Always do a swatch test.
- Avoid steam blocking silk or alpaca—they can felt or lose sheen.
- Great for seam blocking: gently steam seams to flatten and align them before sewing pieces together.
Why it works: Steam relaxes fibers just enough to reshape them without the long drying time of wet blocking. It’s the go-to for quick touch-ups and mid-project adjustments.
Technique #3: Cold (Spray) Blocking for Light Shaping
Cold blocking—also called spray blocking—is the gentlest method. It’s ideal for acrylic yarns, projects with mixed fibers, or pieces that only need minor straightening.
How It Works:
- Pin your item into shape.
- Use a spray bottle filled with clean water to mist the fabric until evenly damp.
- Let dry completely.
This method won’t dramatically reshape dense fabrics, but it’s excellent for:
- Granny squares that need corners squared
- Scarves or cowls with slight curling
- Quick refreshes on stored items that have lost their shape
Key advantage: Minimal risk of overstretching or damaging fibers. It’s the safest option for beginners or sensitive materials.
Specialized Techniques for Common Projects
Now let’s apply these methods to real-world scenarios.
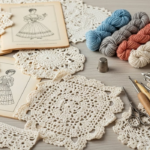
🧣 Lace Shawls: Go Big or Go Home
- Use wet blocking with wires.
- Stretch lace to 70–80% of max tension—overstretching can distort stitches.
- Pin every scallop or point for symmetry.
- Allow extra drying time—lace holds moisture longer.
👕 Garments: Precision is Key
- Block each piece separately before seaming.
- Use measurements from your schematic, not “eyeballing.”
- For sweaters, block fronts/back to match armhole depth and shoulder width.
- After seaming, give the whole garment a light steam block to unify the fabric.
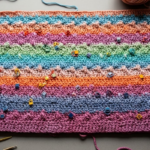
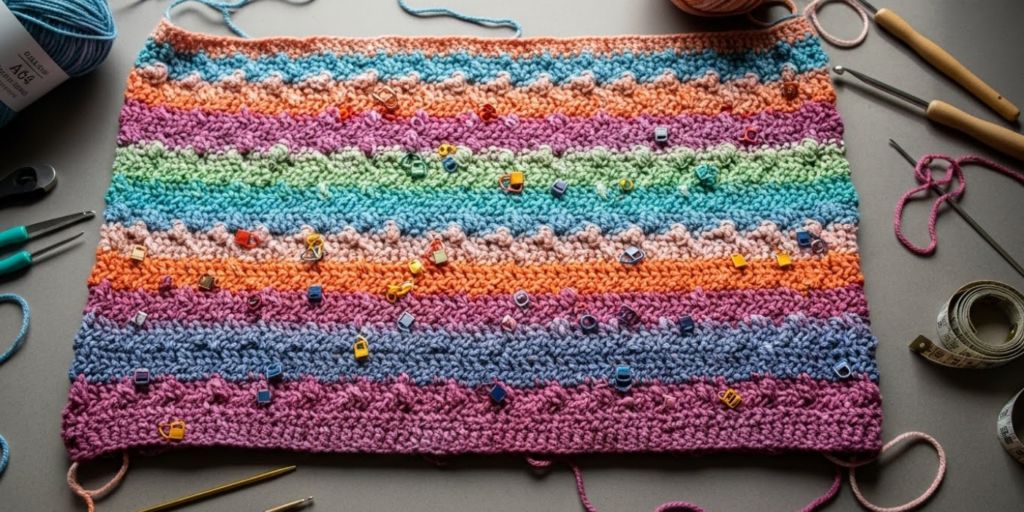
🧶 Granny Squares & Motifs: Uniformity Wins
- Block every square the same way—even if they look similar.
- Use a granny square blocking board or a grid mat to ensure consistent sizing.
- Cold or wet block depending on fiber—cotton squares often need full wet blocking to lie flat.
🧸 Amigurumi & 3D Items: Shape Without Distortion
- Avoid wet blocking (stuffing gets soggy!).
- Use localized steam: gently steam only the areas that need smoothing (like ears or limbs).
- Stuff firmly after any light blocking to maintain shape.
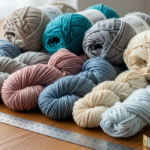
Fiber-Specific Considerations: Not All Yarns Are Equal

Your blocking method should always align with your fiber content:
- Wool & Animal Fibers (merino, alpaca, cashmere): Respond beautifully to wet and steam blocking. They “bloom” and soften.
- Cotton, Linen, Bamboo: Need wet blocking to relax and drape. They don’t have memory, so shaping is permanent once dry.
- Acrylic: Can’t be truly “blocked” like natural fibers—but steam blocking sets the shape temporarily. Avoid high heat to prevent melting.
- Silk: Delicate! Use only light cold blocking or minimal steam.
- Blends: Go with the dominant fiber. A 70% wool/30% acrylic blend can usually handle gentle wet blocking.
Pro Tip: When in doubt, block a swatch first. See how the yarn reacts before committing your entire project.
Tools That Make Advanced Blocking Effortless
You don’t need fancy gear, but the right tools save time and improve results:
✅ Interlocking foam mats – waterproof, pin-friendly, and modular
✅ Rust-proof T-pins or lace pins – fine, strong, and won’t stain
✅ Blocking wires – for smooth, professional edges on shawls
✅ Measuring tape & ruler – for precision shaping
✅ No-rinse wool wash – adds softness and a fresh scent
✅ Garment steamer – safer and more even than an iron
Many of these are affordable and reusable—think of them as an investment in your craft.
Common Mistakes (and How to Avoid Them)
Even experienced crafters slip up. Watch out for:
🚫 Overstretching lace – it can distort stitch definition. Stretch just enough to open the pattern.
🚫 Blocking acrylic like wool – it won’t hold shape the same way. Adjust expectations.
🚫 Skipping blocking entirely – especially on gifts. You’ll be amazed at the difference.
🚫 Using rusty pins – they can stain light-colored yarns permanently.
🚫 Rushing the drying process – never use a hairdryer or heater. It can warp fibers or cause mildew if the inside stays damp.
Remember: patience is part of the process. Let your project dry naturally—it’s worth the wait.
Final Thoughts: Blocking as an Act of Care
At its heart, advanced blocking isn’t just about technique—it’s about respect for your work. Every stitch you made deserves to be seen at its best. Blocking honors the time, creativity, and intention you poured into your project.
Whether you’re making a heirloom shawl, a cozy sweater, or a gift for someone special, taking that extra hour to block properly shows you care—not just about the craft, but about the person who will wear or use it.
So next time you bind off, don’t stop there. Reach for your pins, your spray bottle, or your steamer. Your project isn’t finished until it’s blocked.
Have you tried advanced blocking before? Did it transform a project you thought was “good enough”? Share your before-and-after stories in the comments—we’d love to celebrate your success! And if you found this guide helpful, please share it with a fellow maker who’s ready to level up their finishing skills.
Happy blocking—and even happier wearing!

Luiza Santos is a passionate crochet and knitting enthusiast who finds joy in transforming simple yarn into meaningful, handmade creations. With a deep love for texture, color, and craftsmanship, she believes every stitch carries a story. Luiza brings warmth, creativity, and years of hands-on experience to everything she makes, inspiring others to discover the beauty of fiber arts.