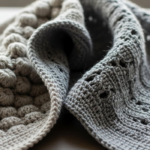
Have you ever tried crocheting a hat that fits perfectly over your ears, a shawl that drapes elegantly around your shoulders, or a sock heel that actually curves with your foot—only to end up with something flat, boxy, or just a little “off”? You’re not alone. For years, many crocheters relied solely on increases and decreases to shape their work, unaware of a subtle but powerful technique hiding in plain sight: short rows.
Short rows are a game-changing method that lets you add curves, angles, and three-dimensional shaping—all without a single increase or decrease. Instead of altering stitch count, you simply work partial rows, creating gentle slopes that mold fabric to the body. Think of them as the secret behind ergonomic ear flaps, contoured sweater backs, seamless sock heels, and even sculpted amigurumi features.
In this guide, you’ll discover how short rows work in crochet, why they’re often overlooked (but shouldn’t be), and—most importantly—a step-by-step method to execute them cleanly and confidently. We’ll also cover common pitfalls, when to use short rows vs. traditional shaping, and real-world project ideas to put your new skill into practice.
Ready to move beyond flat rectangles and unlock true dimensional crochet? Let’s get started!
What Are Short Rows—and Why Should Crocheters Care?
In knitting, short rows are widely used—but in crochet, they’re often underutilized, partly because traditional crochet patterns rarely mention them. Yet, they’re just as effective (and equally elegant) in hook-based fabric.
So, what exactly is a short row?
It’s a row that doesn’t go all the way across your work. Instead, you turn your piece early, leaving the last few stitches unworked. On the next row, you either continue from that turning point or return to work the skipped stitches later. This creates a “wedge” of fabric that subtly curves or lifts a section.
Unlike increases/decreases—which change the total number of stitches—short rows maintain stitch count while redistributing fabric density. This means your edges stay smooth, your stitch pattern remains intact, and your shaping feels organic rather than abrupt.
Why this matters:
- Garments fit better (no more bunching at the back of necklines!).
- Accessories drape naturally (say goodbye to stiff, straight shawls!).
- Amigurumi looks more lifelike (rounded noses, expressive eyebrows).
- You gain creative control without disrupting texture or pattern repeats.
In short: short rows = professional shaping without complexity.
How Short Rows Work: The Basic Mechanics
Let’s break it down simply. Imagine you’re crocheting a rectangle of 20 single crochet stitches. Normally, you’d work all 20, turn, and repeat.
With short rows, you might do this:
- Row 1: Work 15 stitches, turn (leaving 5 unworked).
- Row 2: Work 10 stitches, turn (leaving 5 unworked at the other end).
- Row 3: Work back across all 15, then continue into the previously skipped 5 stitches to return to full width.
This builds a gentle slope on one side of your fabric—perfect for adding shoulder shaping to a sweater back or curving a sock heel.
The key is where and when you turn—and how you handle the “gap” that can form at the turning point (more on that soon!).
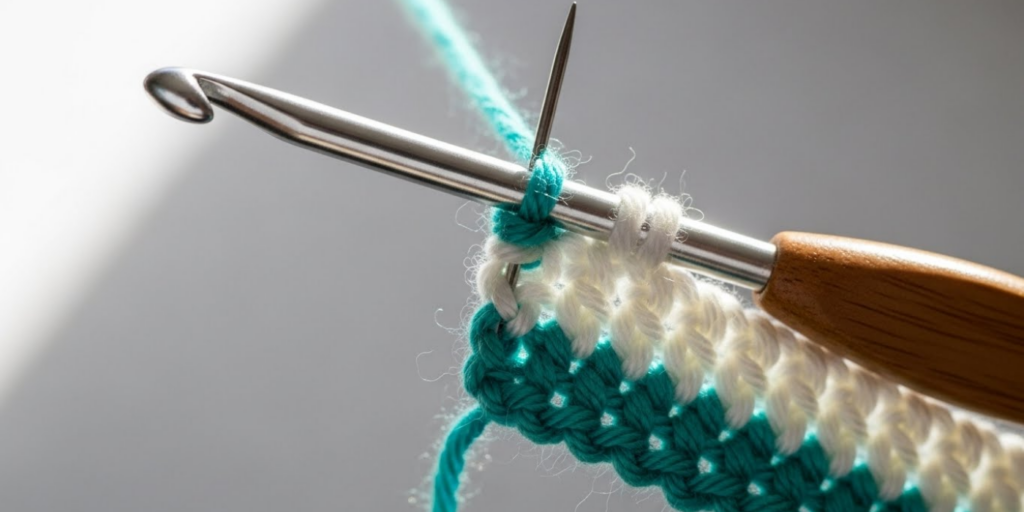
The Wrap-and-Turn Method (Adapted for Crochet)
In knitting, the “wrap-and-turn” technique prevents holes at short row turns. While crochet is naturally denser (so holes are less common), a modified wrap method adds polish and structure—especially in looser stitches like double crochet.
Step-by-Step: Crochet Short Row with “Wrap” (aka “Anchor Stitch”)
- Work to your turning point (e.g., stitch 15 of 20).
- Chain 1 (or your turning chain, depending on stitch height).
- Turn your work.
- Before working the next stitch, yarn over and pull up a loop in the same stitch you just worked—this creates a “pseudo-stitch” that anchors the turn.
- Complete your next stitch as usual (e.g., finish the single crochet by pulling through both loops).
Alternatively, for a cleaner look in tight fabrics:
- Work to the turning stitch.
- Insert hook into next stitch, yarn over, and pull up a loop.
- Then, turn your work and begin the next row from that loop, effectively using it as your first stitch base.
Why This Works
This “anchor” prevents a loose loop or gap at the turn. Later, when you work back over the skipped stitches, you simply crochet into the anchored loop along with its corresponding stitch—closing the gap seamlessly.
Tip: For beginners, start with single crochet—its tight structure hides imperfections better than taller stitches.
When to Use Short Rows (vs. Increases/Decreases)
Not every shaping situation calls for short rows. Here’s how to decide:
✅ Use short rows when you need:
- Localized curvature (e.g., ear flaps, bust darts, sock heels).
- Asymmetrical shaping (e.g., one shoulder higher than the other in a shawl).
- Maintaining pattern integrity (e.g., you don’t want to disrupt a lace or cable repeat with increases).
- Adding depth without changing width (e.g., a contoured pillow back).
❌ Stick with increases/decreases when you need:
- Overall tapering (e.g., sleeves, tapered bags).
- Symmetrical shaping (e.g., triangle shawls worked from the top down).
- Reducing or expanding total stitch count (e.g., amigurumi spheres).
Real-Life Example:
In a crocheted sock, short rows shape the heel cup by building extra fabric where your foot curves—while keeping the total number of stitches the same for the leg and foot. Without short rows, the heel would be flat and uncomfortable.
Common Mistakes—and How to Fix Them
Even experienced crocheters can stumble with short rows. Here are the top issues and solutions:
🔴 Mistake: Creating a visible hole at the turn
✅ Fix: Use the anchor loop method above. Alternatively, slip stitch into the turning stitch before turning—this tightens the edge.
🔴 Mistake: Losing track of rows or stitch count
✅ Fix: Use stitch markers at each short row turning point. Also, keep a row counter or mark your pattern with highlighters.
🔴 Mistake: Uneven tension at the turn
✅ Fix: Practice consistent tension when working the first stitch after the turn. Don’t pull too tight—this can pucker the fabric.
🔴 Mistake: Not integrating skipped stitches smoothly
✅ Fix: When returning to full width, work the anchor loop and its stitch together as one. This closes the gap and blends the fabric.
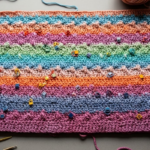
Pro Tip: Swatch first! Make a 10-stitch by 10-row sample and practice 2–3 short rows. It’s the fastest way to build confidence.
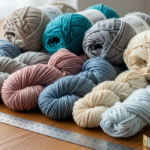
Project Ideas to Master Short Rows
The best way to learn is by doing. Try these beginner-to-intermediate projects that showcase short row shaping:
1. Contoured Ear Flap Hat
Use short rows to curve the ear flaps so they follow the jawline—no more stiff, straight flaps that stick out awkwardly.
2. Bias Knit-Look Scarf (in Crochet!)
Alternate short rows to create a diagonal drape that mimics bias-knit fabric—without changing stitch count.
3. Ergonomic Wrist Rest for Your Desk
Shape a gentle curve with short rows so it supports your wrists naturally during long crafting sessions.
4. Amigurumi Dinosaur Spikes or Bird Wings
Add dimension to flat appendages by working short rows to create a subtle lift or curve.
Each project reinforces the technique in a different context—helping you internalize when and how to use short rows intuitively.
Advanced Tip: Combining Short Rows with Other Techniques
Once you’re comfortable, you can blend short rows with other methods for even more control. For example:
- Short rows + decreases = a sharply defined heel cup in socks.
- Short rows + color changes = gradient shaping in shawls (e.g., deeper color where fabric is thicker).
- Short rows in the round = contoured brims on hats (work short rows on the front only to create a face-hugging curve).
You can even use math to plan short rows:
If you need 1 inch of extra fabric at the center back of a sweater, and your gauge is 4 rows per inch, work 4 short rows, each turning 2 stitches earlier than the last. This creates a smooth, calculated slope.
Why Short Rows Are Underrated (and How They Elevate Your Craft)
Many crocheters avoid short rows because they seem “advanced” or “knitterly.” But in reality, they’re one of the most intuitive shaping tools once you try them. They honor the natural drape and flexibility of crochet fabric—instead of forcing it into geometric shapes.
Moreover, short rows reduce seaming. Why cut and sew pieces when you can shape them in one go? A sweater back with built-in shoulder slope? A seamless sock? That’s the magic of short rows.
Think of them as sculpting with yarn—not just stitching flat planes. And in a world where handmade items compete with mass-produced goods, that attention to fit and form is what makes your work truly special.
Conclusion: Shape with Confidence, Stitch with Intention
Crochet short rows aren’t just a niche technique—they’re a powerful design tool that bridges the gap between basic rectangles and truly tailored, three-dimensional pieces. By mastering them, you gain the ability to:
- Fit garments to real bodies, not just patterns.
- Add subtle artistry to accessories and toys.
- Preserve stitch patterns while still shaping.
- Work seamlessly, reducing finishing time.
You don’t need fancy stitches or complex charts. Just a willingness to turn your work early and trust the process.
So grab your hook, choose a small project, and give short rows a try. You might be surprised how such a small change—working just a few stitches less—can create such a big impact.
Have you used short rows in your crochet? What project surprised you with how well they worked?
Share your experiences, questions, or photos in the comments below—we’d love to see how you’re shaping the future of handmade! 🧶✨

Luiza Santos is a passionate crochet and knitting enthusiast who finds joy in transforming simple yarn into meaningful, handmade creations. With a deep love for texture, color, and craftsmanship, she believes every stitch carries a story. Luiza brings warmth, creativity, and years of hands-on experience to everything she makes, inspiring others to discover the beauty of fiber arts.