You’ve just finished an entire row of your cozy blanket… only to realize the edge looks wavy, the color pattern is off, and that “simple” hat you thought would take an afternoon? It’s now a tangled mess of loops and confused stitches.
Don’t panic.
You’re not alone. Every crocheter—yes, even the pros—has been there. Whether you’re a beginner who just learned the chain stitch or someone who’s been crafting for years, mistakes happen. And that’s not just okay—it’s normal. In fact, some of the most beautiful handmade pieces were born from happy accidents and smart fixes.
This article is your friendly, no-judgment toolkit for fixing the most common crochet errors. We’ll walk through seven real-life mistakes (with easy, step-by-step solutions), explain why they happen, and give you practical tips to avoid them next time. No fancy terminology. No overwhelming charts. Just clear, calm, practical help—so you can get back to the joy of creating without the frustration.
By the end, you’ll not only know how to fix your current project—you’ll feel more confident tackling the next one. Let’s unravel those errors together.
1. The Dreaded “Tight Chain” Problem (And How to Loosen Up)
Ever start a project and feel like your foundation chain is pulling so tight you could use it as a guitar string? You’re not just imagining it—this is one of the most common beginner mistakes.
Here’s why it happens: When you make your first chain, your fingers are often tense. You’re focused on getting the loops right, so you grip the yarn like you’re holding onto a lifeline. Result? A foundation row that’s so tight, your next row of stitches looks like it’s struggling to climb out of a trench.
The fix?
Try this simple trick: Chain over your finger. After making each chain stitch, gently slide the loop onto your index finger before pulling the yarn through. This creates a tiny bit of slack. Repeat for every stitch. It might feel weird at first, but your hands will adapt in minutes.
Pro tip: If you’ve already completed the chain and it’s too tight? Don’t rip it out (yet). Try using a hook one size larger for your first row of stitches. The bigger hook will stretch the chain slightly and give your stitches room to breathe.
Why this matters: A too-tight foundation chain doesn’t just look bad—it distorts your entire project. Your blanket might curl, your sleeves won’t fit, and your peace of mind? Gone. A relaxed chain = a happy project.
2. Accidentally Adding or Dropping Stitches (The Sneaky Ones)

You count your stitches every row. You swear you did. So why does your scarf suddenly have 3 extra stitches… or 5 missing ones?
This happens more than you think. Often, it’s because you’re accidentally working two stitches into one space, or skipping the last stitch of the row without realizing it. The worst part? It doesn’t show until you’re halfway through your project.
Here’s how to catch it early:
Use a stitch marker. Yes, even if you think you’re “good at counting.” Place a colorful loop or safety pin in the last stitch of each row. When you finish a row, check: Is the marker still there? Did you work into it? If not, you missed a stitch. If it’s two markers in one spot? You’ve added one by accident.
Another trick: Count your stitches every 5–10 rows—not just at the end. It’s like checking your GPS while driving. You don’t wait until you’re lost to realize you took a wrong turn.
Real-life story: My friend Lisa made a beautiful baby blanket… until she noticed the edges were slanting. She’d been adding a stitch at the beginning of every row—thinking she needed to “start strong.” Turns out, she was just miscounting the turning chain as a stitch. Once she learned to not count the chain as a stitch, her blanket straightened out in one row.
Bonus: If you’ve already gone too far, don’t despair. You can unravel just one row using a crochet hook. Gently pull the yarn from the last stitch backward, one loop at a time, until you reach the error. Then rework that row. It’s slower, but way better than starting over.
3. Uneven Edges: Why Your Project Looks Like a Wavy Sea
You’ve been crocheting for hours. Your colors are perfect. Your tension is decent. But the sides? They look like ocean waves after a storm.
This is almost always caused by inconsistent tension or miscounting at the edges.
Some crocheters tighten their stitches at the beginning of a row (because they’re nervous), then loosen up at the end (because they’re tired). Others forget to work into the very last stitch—leaving a gap that causes the edge to pucker.
Solution #1: Treat your edge stitches like VIPs.
Always work into the last stitch of the row. That’s the one right before your turning chain. If you skip it, your edge will gap. If you double up on it, your edge will bulge.
Solution #2: Practice “edge awareness.”
As you crochet, pause every few stitches and glance at the side of your work. Is it straight? If you see a little bump or dip, stop. Check your last two stitches. Adjust now—it’s easier than fixing it later.
Solution #3: Use a row counter.
Yes, it sounds old-school, but writing down how many rows you’ve done helps you spot patterns. If your edge gets wavy every 12 rows? You might be forgetting to count the turning chain as a stitch on those rows. Awareness is your superpower.
Fun fact: Many experienced crocheters actually intentionally add a stitch at each end of the row for a decorative edge—but that’s a design choice, not a mistake. Know the difference.
4. Holes in Your Work? It’s Not a Design Feature (Unless You Meant It)
You’re making a delicate shawl… and suddenly, there are little gaps between your stitches. They look like lace holes—but you didn’t plan for lace.
This usually happens when you’re working into the wrong part of the stitch.
For example, in single crochet, you should insert your hook under both loops of the V-shape at the top of the stitch from the row below. But if you only go under the front loop (or worse—between stitches), you create a hole.
How to fix it:
Look closely at your previous row. Find a single crochet stitch. See that little “V”? That’s your target. Insert your hook under the left leg of the V, then the right leg. You’ll feel a slight “click” when you’re in the right spot.
Pro tip: If you’re working in the round (like a granny square), holes often appear at the joining point. To avoid this, always slip stitch into the first stitch of the round—not the chain. And make sure your chain isn’t too tight when you start the round.
What if you already made the holes?
No need to rip it all out. Use a tapestry needle and matching yarn to weave the gaps closed. Thread the needle, gently pull the yarn through the hole’s edges, and cinch it tight. It’s like sewing a tiny seam—invisible from the front.
5. Twisted Rounds: When Your Project Looks Like a Pretzel
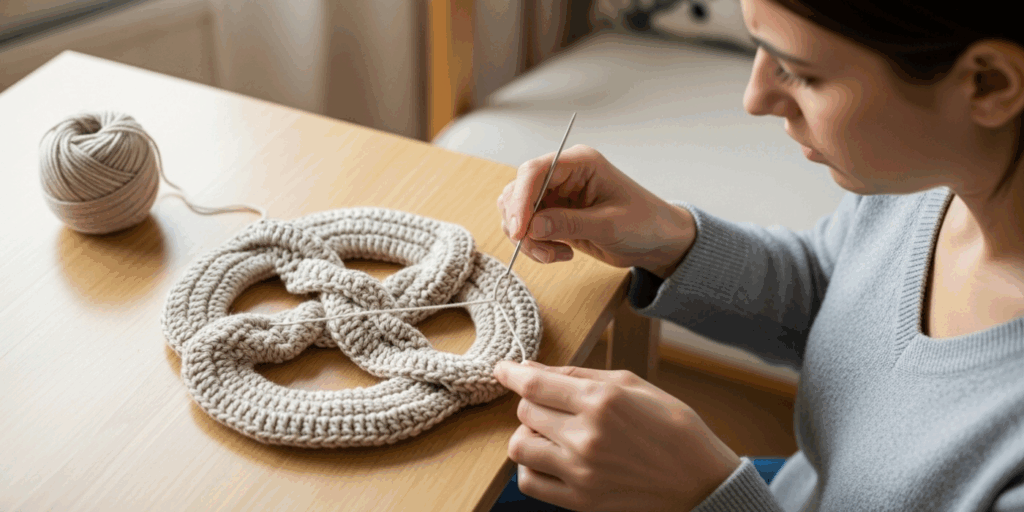
You’ve been crocheting in the round—maybe a beanie, a coaster, or a basket—and suddenly, your work looks like it’s spiraling. There’s no clear starting point. The stripes are crooked. It’s… confusing.
This happens when you don’t join rounds properly—or when you forget to turn your work after joining.
The culprit? The “spiral effect.”
If you keep crocheting without joining and turning, your rounds naturally spiral upward. That’s fine for some patterns (like amigurumi), but if you’re supposed to have clean, stacked rounds? You’ve got a problem.
How to fix it:
At the end of each round, always:
- Slip stitch into the first stitch of the round.
- Pull the yarn snug (but not tight).
- Move your stitch marker to the new first stitch.
- Start the next round in the same spot—not one stitch over.
If you’ve already spiraled?
You can still fix it. Find the first stitch of your first round. Use a contrasting yarn to mark it. Then, carefully count how many rounds you’ve done. On the next round, stop the spiral by joining with a slip stitch and starting fresh. It’ll leave a tiny seam—but your project will look intentional, not accidental.
Bonus insight: Many modern patterns now encourage spirals for seamless looks. The key? Know your pattern’s intention. If it says “join each round,” then join. If it says “work in continuous rounds,” then spiral with pride!
6. Color Changes That Look Like a Messy Tie-Dye
You switched yarn colors for a striped blanket… and now your colors are bleeding, your ends are dangling everywhere, and the back looks like a spider’s web.
Color changes are beautiful—but if done carelessly, they become a headache.
The biggest mistake? Cutting the yarn too short and leaving long tails. Or worse—tying knots.
The solution?
Carry your unused color up the side.
When you’re done with Color A and ready for Color B, simply drop Color A, pick up Color B, and start your next stitch. Let the old yarn hang loose behind your work. After a few rows, gently twist the two strands together once every 3–4 stitches. This locks them in place and prevents gaps.
For clean joins:
When finishing a color, weave in the ends as you go. Use a tapestry needle to thread the tail through the back loops of 3–4 stitches. Then trim. No knots. No bulk.
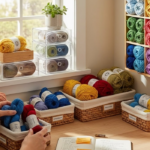
Pro tip: If you’re changing colors mid-row (like in intarsia), use bobbins or small balls of yarn for each color. Keep them untangled with a cup or organizer. A little prep = zero frustration later.
Real win: One crocheter I know switched colors every row on a blanket and never tied a single knot. Her project looked like it came from a store—and she swears it only took 10 extra minutes of planning.
7. The “I Forgot My Pattern” Panic
You’re mid-project. You’ve lost your pattern. Your notes are scribbled on a napkin. Your phone died. And now? You have no idea how many rows you’ve done—or what comes next.
This happens to everyone. Even seasoned crocheters.
Solution? Build your own safety net.
- Write it down. Use a notebook, sticky notes, or even a notes app. Jot down: “Row 1: Chain 12, sc in 2nd ch from hook, sc in each ch to end. (11 sc).”
- Use a highlighter. As you complete each row, highlight it. You’ll instantly know where you are.
- Take a photo. Snap a picture of your work after every 5 rows. Compare it to the pattern photo. You’ll spot mismatches fast.
If you’re already lost?
Count your stitches. Compare your work to the pattern’s photo. If it looks like Row 3, try working Row 4. If it doesn’t look right, go back. You’ll find your mistake faster than you think.
And here’s the secret: Most patterns are repetitive. Once you recognize the rhythm—like “chain 3, double crochet in next stitch, skip one, dc in next”—you don’t need to read the pattern anymore. You’ll feel it.
Conclusion: Mistakes Are Just Part of the Journey
Let’s be honest: Crocheting isn’t about perfection. It’s about presence. It’s about the quiet focus of one loop after another. The rhythm of your hands. The way a blanket grows stitch by stitch, row by row—sometimes messy, sometimes beautiful, always yours.
Every error you’ve fixed? That’s not failure. That’s growth.
You didn’t just learn how to fix a twisted round—you learned patience.
You didn’t just fix a dropped stitch—you learned attention to detail.
You didn’t just weave in ends—you learned resilience.
The next time you see a mistake, don’t sigh. Smile.
Because you now have the tools to fix it.
And the confidence to keep going.
So… what’s your most memorable crochet mistake?
Did you turn a hat into a bag? A scarf into a wall hanging?
I’d love to hear your story—drop a comment below. Let’s turn our blunders into badges of honor.
And if this helped you today? Share it with a friend who’s stuck on their project. Sometimes, the best gift isn’t a new hook… it’s knowing you’re not alone.
Now go on. Grab your yarn. Find that mistake. And fix it—with kindness, curiosity, and a little bit of joy.
Your next project is waiting. And it’s going to be amazing.

Luiza Santos is a passionate crochet and knitting enthusiast who finds joy in transforming simple yarn into meaningful, handmade creations. With a deep love for texture, color, and craftsmanship, she believes every stitch carries a story. Luiza brings warmth, creativity, and years of hands-on experience to everything she makes, inspiring others to discover the beauty of fiber arts.