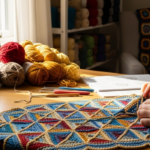
Imagine this: You’re curled up on your favorite armchair, a warm cup of tea beside you, and in your hands—a tiny, colorful square of yarn that you made yourself. It’s imperfect. Maybe one corner is a little lopsided. But it’s yours. And when you stitch four of them together? You’ve got a cozy blanket that tells a story. That’s the magic of the granny square.
If you’ve ever looked at a vintage afghan, a trendy tote bag, or even a pair of slippers covered in colorful hexagons and thought, “I could never make that,”—this guide is for you. The granny square isn’t just a crochet pattern. It’s a gateway. A simple, satisfying, and deeply rewarding way to dive into the calming world of handcrafting. Whether you’re looking to unwind after a long day, create meaningful gifts, or finally learn a skill your grandma swore by, the granny square is your perfect starting point.
In this guide, we’ll walk through everything you need to know as a complete beginner. No prior experience? That’s fine. We’ll start from the very first loop. You’ll learn how to make your first square, choose the best yarn and hooks, fix common mistakes without frustration, and even turn your squares into practical projects like blankets, pillows, and bags. By the end, you won’t just know how to crochet a granny square—you’ll feel proud of what you’ve created. And trust me, that feeling? It’s better than any store-bought blanket.
Why the Granny Square Is the Perfect Beginner Project
Let’s be honest—learning to crochet can feel overwhelming. There are so many stitches, abbreviations, and patterns out there. But the granny square? It’s like the “Hello World” of crochet. Simple. Repetitive. Satisfying.
What makes it ideal for beginners is its structure. It’s built in rounds, meaning you work in a circle, adding layers one at a time. Each round follows the same basic pattern: chains, double crochets, and clusters of three stitches. Once you master the first round, you’re already 80% there. The repetition isn’t boring—it’s comforting. It’s like meditation with yarn.
Plus, granny squares are forgiving. If you make a mistake? You don’t have to unravel your whole project. Just frog (that’s crochet-speak for “rip it out”) the last round, fix it, and keep going. No panic. No pressure.
And here’s the best part: you can make them anywhere. On the bus. In waiting rooms. While watching TV. All you need is your hook, some yarn, and five minutes. I once made my first granny square while my kid napped on my chest. By the time he woke up, I had a full round done—and a sense of calm I hadn’t felt in weeks.
Granny squares also connect us to tradition. Originating in the 1800s, they were a way for women to use up leftover yarn and create warm blankets during hard times. Today, they’re making a huge comeback—not just as nostalgia, but as a mindful, sustainable craft. In a world of fast fashion and disposable goods, making something by hand feels revolutionary.
You’re not just learning a stitch. You’re joining a community of makers who value patience, creativity, and the quiet joy of building something beautiful with your own hands.
What You’ll Need: No Fancy Tools Required
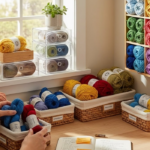
Before you dive in, let’s talk supplies. You don’t need a fancy craft store haul to get started. In fact, you probably already have most of what you need.
First, yarn. For beginners, choose a medium-weight (Category 4) acrylic yarn. Why? It’s affordable, easy to see, and forgiving if you pull too tight or too loose. Avoid super bulky or super thin yarns—they’re trickier to handle when you’re still learning. Look for bright colors! They make it easier to count stitches and see your progress. I recommend starting with 3–4 contrasting colors—it’s fun and visually rewarding.
Next, your crochet hook. A size I (5.5 mm) or J (6 mm) is perfect for medium yarn. Check the label on your yarn—it’ll usually recommend the ideal hook size. If you’re unsure, start with a 6 mm. It’s a happy medium.
You’ll also need:
- Scissors (a small, sharp pair works best)
- A tapestry needle (for weaving in ends later)
- A stitch marker (or a small piece of contrasting yarn—you can even use a paperclip!)
That’s it. No fancy gadgets. No expensive kits. Just you, your hands, and a little bit of yarn.
Pro tip: Buy a small skein of each color (around 50g). You don’t want to waste yarn if you decide it’s not your thing. Start small. Fall in love slowly.
And if you’re unsure about your hook? Visit a local craft store and ask to hold a few. The weight and grip matter more than you think. Your hand should feel relaxed, not tense.
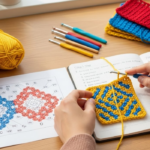
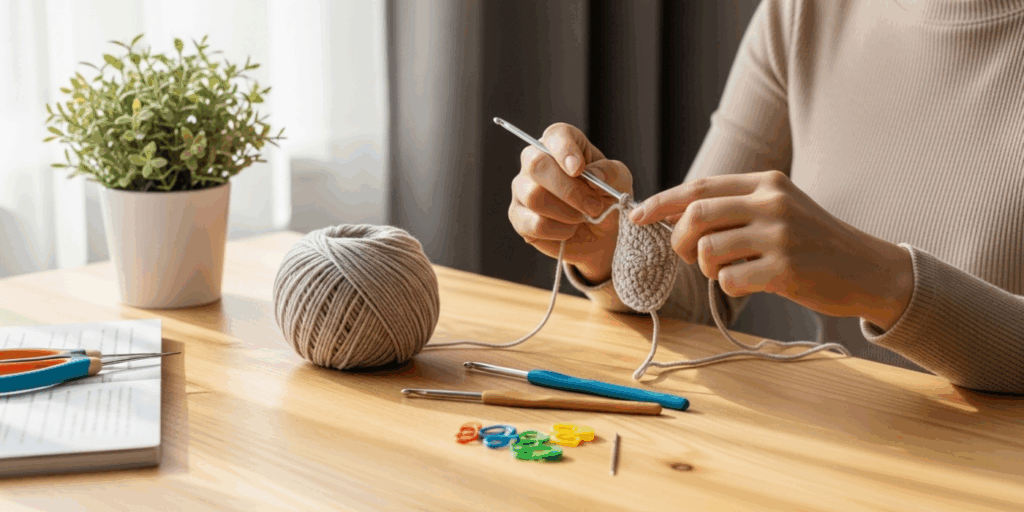
Step-by-Step: Making Your First Granny Square (No Experience Needed!)
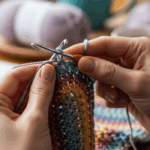
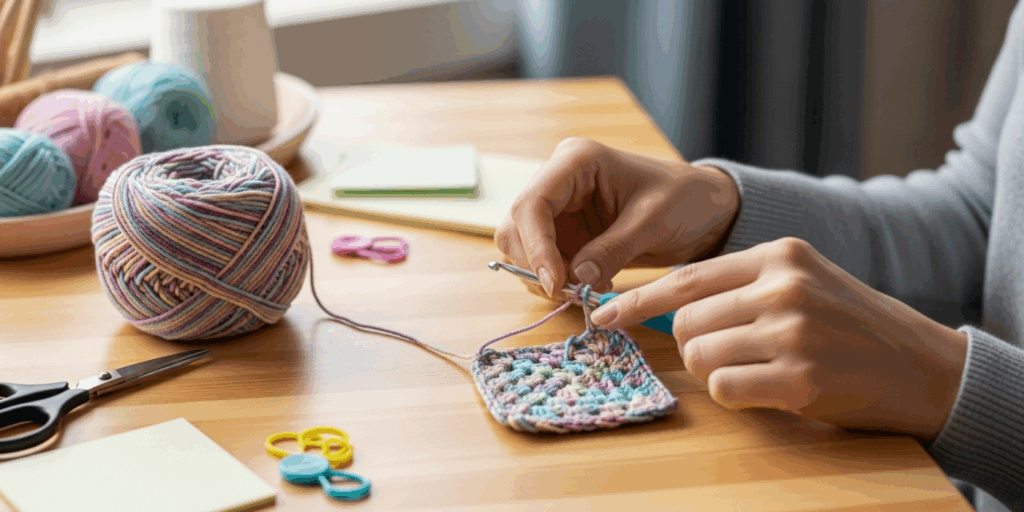
Okay, let’s get our hands dirty. Follow these steps slowly. Pause. Repeat. There’s no race here.
Round 1: The Magic Ring
- Make a slip knot and place it on your hook.
- Wrap the yarn over your hook and pull through to create a loop. This is your starting point.
- Chain 4, then insert your hook into the first chain. Pull the yarn through to form a ring. (This is called a magic ring. If it feels tricky, just chain 4 and slip stitch into the first chain to make a circle.)
- Now, chain 3 (this counts as your first double crochet).
- Work 2 more double crochets into the ring. That’s 3 total.
- Chain 2.
- Work 3 double crochets into the ring again. Chain 2.
- Repeat step 7 two more times. You’ll end up with 4 clusters of 3 double crochets, each separated by a chain-2 space. (That’s your “spike” or “corner.”)
- Slip stitch into the top of your starting chain-3 to close the round.
You did it! That’s your first granny square round. It should look like a tiny four-petaled flower.
Round 2: Building the Square
- Chain 3 (again, this counts as your first double crochet).
- Work 2 double crochets into the same chain-2 space.
- Chain 2.
- Work 3 double crochets into the next chain-2 space.
- Repeat steps 3 and 4 three more times (for a total of 4 corners).
- Slip stitch into the top of your starting chain-3 to finish.
That’s it. You’ve just made a granny square with two rounds. It’s small, but it’s real. And it’s yours.
Pro tip: Count your stitches as you go. Each corner should have 3 dc + 2 ch + 3 dc. If you miss one, your square might start to curl. Don’t worry—this happens to everyone. Just undo the last round and try again. You’ll get it.
Common Mistakes (And How to Fix Them Without Crying)
Let’s talk about the inevitable: mistakes. Everyone makes them—even seasoned crocheters. But here’s the secret: most are easy to fix.
Problem 1: My square looks like a pentagon.
You added too many stitches in one corner. Check your chain-2 spaces. You should have exactly four. If you have five, you accidentally added an extra cluster. Frog back to the last round and recount.
Problem 2: My square is curling up.
This usually means you’re pulling your yarn too tight. Try relaxing your grip. Imagine you’re holding a baby bird—not too loose, not too tight. If it’s already curled, block it: pin it flat on a towel, mist with water, and let it dry. Works like magic.
Problem 3: My colors look messy.
Don’t worry! It’s normal when you’re switching yarns. Just weave in your ends neatly as you go. Cut the old yarn with about 6 inches of tail. Start the new color by pulling it through the last loop, then continue crocheting. Later, use your tapestry needle to tuck the tails into the back of your stitches.
Problem 4: I lost count halfway.
Use stitch markers! Clip one into the top of your first stitch of each round. Or tie a small loop of contrasting yarn around a corner. It’s a tiny thing—but it saves hours of frustration.
Remember: Crochet isn’t about perfection. It’s about presence. A slightly uneven square still holds warmth. Still tells a story.
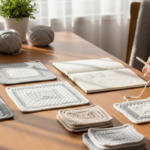
Turning Squares Into Something Real: Blankets, Bags & Beyond
Now that you’ve got one square, imagine 25 of them. Or 49. Or 100.
That’s where the magic really happens.
Granny squares are modular. That means you can make them one at a time, then sew them together however you like. No pattern required. No pressure. Just creativity.
Project Idea #1: The Cozy Throw Blanket
Join 49 squares (7×7 grid) in a rainbow of colors. Sew them together with a simple slip stitch or mattress stitch. Add a border of single crochet around the whole blanket for a clean finish. It’s not just warm—it’s a conversation starter.
Project Idea #2: The Tote Bag
Make 6 squares: 4 for the sides, 1 for the bottom, and 1 for the back. Sew them together, add straps made from braided yarn, and voilà—your own handmade tote. Perfect for farmers markets or library runs.
Project Idea #3: The Pillow Cover
Nine squares in matching colors make a beautiful 9×9 inch pillow. Add a zipper or envelope closure. Instant home decor that feels personal.
Project Idea #4: The Memory Blanket
Use yarn from old sweaters, baby clothes, or wedding veils. Each square becomes a memory. This isn’t just a blanket—it’s a hug you can wrap around yourself.
You don’t need to plan it all out. Start with one square. Then two. Then five. Before you know it, you’ll have a pile of squares—and a project that’s growing with you.
And here’s the truth: people notice handmade things. A friend once cried when I gave her a granny square pillow I made from my daughter’s baby blanket yarn. “I can feel the love in it,” she said. That’s the power of making with your hands.
Why This Craft Matters More Than Ever
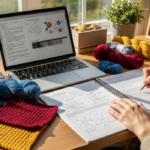
In a world of screens, notifications, and endless scrolling, crochet offers something rare: stillness.
When you crochet, your hands are busy, but your mind gets quiet. You’re not checking emails. You’re not worrying about tomorrow. You’re counting stitches. Feeling yarn. Making something slow, steady, and real.
Studies show that repetitive crafts like knitting and crocheting reduce stress, lower heart rate, and even help with anxiety and depression. It’s not magic—it’s neuroscience. The rhythm of the hook, the texture of the yarn, the focus on each loop—it all activates the brain’s relaxation response.
Plus, it’s sustainable. Every granny square you make replaces something mass-produced. You’re choosing slow fashion over fast trends. You’re investing time instead of money. And when you give a handmade gift? You’re giving a piece of your heart.
I’ve seen grandmas teach their grandkids. I’ve seen teenagers bonding over YouTube tutorials. I’ve seen men in their 60s pick up crochet after retirement. This craft doesn’t care about your age, your background, or your skill level. It only asks: Are you ready to begin?
Ready to Start? Your First Step Is Just a Hook Away
You don’t need to be an artist. You don’t need to be fast. You don’t need to be perfect.
All you need is a hook, some yarn, and the willingness to try.
Start today. Make one square. Don’t worry if it’s ugly. Don’t worry if it’s small. Just make it.
Then make another.
And another.
Before long, you’ll look back and realize: you didn’t just learn to crochet. You learned patience. You learned persistence. You learned how to create something beautiful from nothing.
And that’s a gift no store can sell.
So grab your yarn. Tie your slip knot. And take that first stitch.
You’ve got this.
Now it’s your turn.
Have you ever tried crocheting a granny square? What stopped you—or what inspired you to start? Share your story in the comments below. I’d love to hear about your first square, your favorite color combo, or even your biggest crochet fail (we’ve all had one!).
And if this guide helped you, share it with a friend who needs a little calm in their day. Because sometimes, the most powerful thing we can give each other isn’t advice—it’s permission to begin.
Happy crocheting.
Your next square is waiting. 🧶

Luiza Santos is a passionate crochet and knitting enthusiast who finds joy in transforming simple yarn into meaningful, handmade creations. With a deep love for texture, color, and craftsmanship, she believes every stitch carries a story. Luiza brings warmth, creativity, and years of hands-on experience to everything she makes, inspiring others to discover the beauty of fiber arts.