Imagine you’re crocheting a cozy striped blanket, a vibrant granny square tote, or a playful amigurumi character—only to be stopped in your tracks by unsightly knots and messy tails every time you switch yarn colors. Those little bumps and lumps can ruin the smooth, professional look you’ve worked so hard to achieve.
The good news? You absolutely can change colors in crochet without a single knot—and without sacrificing neatness or durability. In fact, experienced crocheters rarely tie knots at all. Instead, they use clever, invisible techniques that create clean transitions and secure joins, all while keeping the wrong side just as tidy as the right.
In this guide, you’ll learn three foolproof methods to change colors seamlessly—whether you’re working in rows or rounds. We’ll walk through each step with clear instructions, explain when to use each technique, and share pro tips to avoid common mistakes. By the end, you’ll be confidently switching colors like a seasoned maker, with projects that look polished on both sides.
Ready to say goodbye to bulky knots and hello to flawless colorwork? Let’s dive in!
Why Avoiding Knots Matters in Crochet
First, let’s talk about why knots are more than just an eyesore. While tying a quick knot might seem like the easiest way to join a new color, it can cause real problems down the line.
For starters, knots create lumps that disrupt the texture of your fabric—especially in garments, baby blankets, or stuffed toys where softness matters. Over time, knots can also come undone during washing or wear, leading to unraveling. And if you’re gifting or selling your work, visible knots can make even the most intricate project look amateurish.
On the flip side, weaving in ends properly and joining yarn smoothly gives your finished piece a clean, professional finish. It also makes blocking easier and ensures your project holds up beautifully over time.
The secret? Join new yarn at the end of a stitch—not in the middle—and let the structure of your crochet do the work of securing the tail. No knots needed!
Method 1: The Invisible Join at the End of a Row (Best for Flat Projects)
")
This is the go-to technique for striped scarves, dishcloths, blankets, and any project worked back and forth in rows. It creates a nearly invisible color change on both the right and wrong sides.
Step-by-Step Instructions:
- Work your last stitch of the row (e.g., a single crochet) up to the final yarn over and pull-through. You should have 2 loops on your hook.
- Drop the old yarn and pick up the new color.
- Yarn over with the new color and pull through both loops to complete the stitch. The color change happens cleanly at the top of the stitch.
- Chain 1 (or your turning chain) with the new color and turn your work.
- Weave in both tails later using a yarn needle—about 3–4 inches is usually enough for cotton or acrylic; wool may need less due to its natural grip.
Pro Tips:
- Always change colors on the last stitch of the row, not mid-row, to keep transitions aligned.
- Keep a consistent tension when pulling through with the new color to avoid loose or tight stitches.
- For extra security, begin weaving in the old tail on the wrong side as you work the next few stitches—this anchors it without extra bulk.
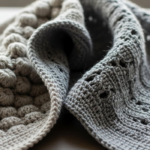
This method gives you crisp stripes and is perfect for projects where the wrong side might be visible (like reversible blankets).
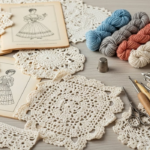
Method 2: The Seamless Join in the Round (Ideal for Granny Squares, Hats, and Amigurumi)
When working in continuous rounds—like for hats, toys, or motifs—you can’t just drop a color and pick up a new one without creating a jog or gap. That’s where this technique shines.
How It Works:
Instead of joining with a slip stitch at the end of the round, you’ll carry the old color up the inside and introduce the new color at the base of the first stitch of the new round.
Step-by-Step:
- When you reach the last stitch of the round, complete it with the old color.
- Do NOT slip stitch to join. Instead, drop the old yarn and insert your hook into the first stitch of the next round.
- Pick up the new color, yarn over, and pull up a loop.
- Continue your first stitch of the new round (e.g., chain 1 for single crochet, chain 2 for double crochet) using the new color.
- Work the rest of the round as usual.
Important: This method works best when you’re changing color at the beginning of a new round, not mid-round. For mid-round changes (like in intarsia), other techniques are better—but that’s advanced colorwork!
Bonus Tip – Avoiding the “Jog”:
To make stripes in the round look seamless, try the “jogless join”: after completing the first round in the new color, insert your hook into the stitch below the first stitch of that round on the next round, and work your stitch there. This shifts the seam slightly and hides the step.
Method 3: The Russian Join (Perfect for No-Tails, No-Weaving Magic)
If you hate weaving in ends, the Russian Join (also called the “magic knot” alternative—but knot-free!) is a game-changer. It’s a splicing technique that joins two yarns invisibly, with no tails to weave in later.
How to Do It:
- Thread each yarn tail (about 4 inches) into a large-eye yarn needle.
- Insert the needle into the center of the yarn strand (about 2 inches from the end) and push it through the core of the yarn for 1.5–2 inches. This creates a hollow tunnel.
- Pass the second yarn through the tunnel of the first, and vice versa.
- Pull both ends gently until the join snugs up inside the yarn. Trim any excess.
Once joined, you simply crochet over the splice as if it were regular yarn. Because the join is inside the strand, it’s completely invisible and adds no bulk.
When to Use It:
- Great for long color changes (e.g., switching from blue to yellow halfway through a blanket).
- Ideal for slick or slippery yarns (like silk or bamboo) that don’t hold knots well.
- Not recommended for very fuzzy, textured, or thick yarns where threading is difficult.
Note: While the Russian Join eliminates weaving, it does use up a bit more yarn. But for big projects with many color changes, the time saved is worth it!
Common Mistakes (and How to Avoid Them)
Even with the right technique, small errors can lead to messy results. Here are the top pitfalls—and how to dodge them:
🔴 Changing color in the middle of a stitch: This leaves a “barber pole” effect and weakens the join. Always change at the pull-through step of the last stitch.
🔴 Pulling the new yarn too tightly: This can pucker your fabric. Keep your tension consistent with the rest of your work.
🔴 Not leaving long enough tails: Aim for 4–6 inches. Short tails can slip out during washing. Too long, and you’ll have more to weave in—but better safe than sorry!
🔴 Ignoring the wrong side: If you’re making something like a shawl or reversible pillow, take time to make the back neat too. Use the same clean join methods—it makes a huge difference.
🔴 Using knots “just this once”: One knot can lead to another! Stick to knot-free methods from the start, and it’ll become second nature.
Weaving In Ends Like a Pro (Because Even Knot-Free Joins Need It)
Yes, even with invisible joins, you’ll usually have two tails to secure. But weaving doesn’t have to be tedious!
Best Practices:
- Use a blunt-tipped yarn needle to avoid splitting fibers.
- Weave diagonally across stitches on the wrong side—it’s more secure than weaving in a straight line.
- For stretchy fabrics (like garments), weave in multiple directions to prevent pulling.
- Weave in as you go: After a few rows, take a moment to secure the tail. It’s faster than doing it all at the end.
Pro Hack: For acrylic yarn, lightly steam or block the woven-in area—the fibers melt slightly and lock the tail in place. (Don’t do this with natural fibers like wool—it can felt!)
Project Ideas to Practice Your New Skill
Ready to put these techniques to the test? Try these beginner-friendly, colorwork-focused projects:
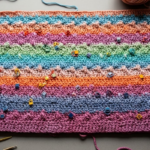
✅ Striped Dishcloth: Practice row-by-row color changes with cotton yarn. Easy to wash and reuse! ✅ Granny Square Pillow: Switch colors every round to create bold, graphic squares. ✅ Simple Striped Beanie: Work in the round and use the seamless join for jog-free stripes. ✅ Amigurumi Rainbow Ball: Change colors every few rounds on a sphere—great for mastering round joins.
Each project reinforces muscle memory, so by your third or fourth color change, it’ll feel natural.
Final Thoughts: Clean Color Changes = Confidence in Your Craft

Changing colors without knots isn’t just about aesthetics—it’s about respecting your craft and your time. Every smooth join, every hidden tail, is a quiet signature of your skill and care.
And remember: even expert crocheters had to practice their first color change. Don’t be discouraged if your first few tries aren’t perfect. With these techniques, you’re already miles ahead of the “tie-a-knot” crowd.
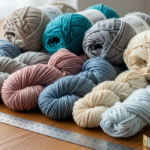
So grab two skeins of yarn, pick a simple pattern, and give it a try. You’ll be amazed at how quickly your work starts looking gallery-ready—inside and out.
Conclusion: Make Your Next Project Your Cleanest Yet
In this guide, you’ve learned three reliable, knot-free methods to change colors in crochet:
- The end-of-row join for flat projects,
- The seamless round join for circular work, and
- The Russian Join for nearly no-weave convenience.
You also discovered how to avoid common mistakes, weave in ends effectively, and choose the right technique for your project. These skills will elevate everything you make—from baby blankets to market-ready goods.
Now it’s your turn! Pick a small project this week and commit to zero knots. Notice the difference in texture, drape, and finish. Your future self (and anyone who receives your handmade gift) will thank you.
Have you tried any of these methods? Which one is your favorite?
Share your tips, questions, or before-and-after photos in the comments below—we’d love to see your colorful creations! 🌈🧶

Luiza Santos is a passionate crochet and knitting enthusiast who finds joy in transforming simple yarn into meaningful, handmade creations. With a deep love for texture, color, and craftsmanship, she believes every stitch carries a story. Luiza brings warmth, creativity, and years of hands-on experience to everything she makes, inspiring others to discover the beauty of fiber arts.