Introduction
Learning how to crochet your first project is a transformative experience that opens the door to endless creativity, mindfulness, and even entrepreneurial opportunities. For countless beginners, that initial journey from fumbling with a hook to completing a tangible handmade item builds confidence and establishes a foundation for lifelong crafting. This comprehensive guide walks you through every essential detail—from selecting the right materials to mastering foundational stitches—so you can successfully crochet your first project with clarity and purpose. Whether you dream of making cozy scarves, personalized gifts, or eventually building a handmade business, starting with a well-structured beginner project sets the tone for sustainable progress. In my years of teaching crochet workshops and consulting with emerging handmade brands, I’ve observed that those who invest time in understanding core techniques early on avoid common frustrations and develop skills that translate directly into quality output and marketable products. This article delivers a meticulously detailed roadmap designed not just to teach stitches, but to cultivate the mindset and habits of a capable, confident crocheter ready to explore the craft’s full potential.
What This Topic Means for Crochet & Knitting Businesses

For entrepreneurs building handmade brands, the ability to guide beginners through their first successful project isn’t just educational—it’s foundational to customer loyalty and community growth. When a new crocheter completes their initial piece without overwhelm, they’re far more likely to return for patterns, kits, or advanced tutorials. From working with multiple crochet brands, I’ve seen that businesses which prioritize beginner-friendly onboarding—through clear video supplements, thoughtfully curated starter kits, and empathetic troubleshooting content—cultivate stronger brand advocates. These customers often evolve into repeat buyers who purchase higher-value items like premium yarns, specialized hooks, or digital pattern bundles. Moreover, content focused on “how to crochet your first project” consistently ranks well in search engines because it addresses a high-intent, evergreen query. Brands that create authoritative, detailed resources around this topic position themselves as trusted voices, which directly supports organic traffic growth and AdSense revenue potential through engaged, longer session durations. In many successful handmade businesses, the first-project tutorial serves as a strategic gateway—a low-barrier entry point that funnels curious beginners into a broader ecosystem of products and services.
Why This Strategy Works Especially Well in the Crochet Community
The crochet community thrives on accessibility and intergenerational knowledge sharing, making the “first project” approach uniquely effective. Unlike crafts requiring expensive machinery or complex setups, crochet begins with minimal tools—a single hook and affordable yarn—lowering the psychological and financial barrier to entry. Experienced designers often recommend starting with small, functional items like dishcloths or headbands because they provide rapid gratification while reinforcing muscle memory. This immediate sense of accomplishment fuels motivation, which is critical during the steep initial learning curve where tension control and stitch recognition feel awkward. Additionally, the tactile, rhythmic nature of crochet offers meditative benefits that resonate deeply in today’s fast-paced digital world. From my observations at fiber festivals and online maker groups, beginners who complete a simple first project frequently join social media communities to share photos, ask questions, and seek pattern recommendations—organic behaviors that amplify brand visibility without paid advertising. The emotional payoff of creating something by hand fosters a powerful connection to the craft, transforming casual hobbyists into dedicated practitioners who invest in tools, materials, and education over time.
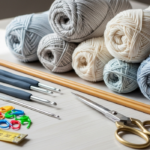
Materials, Tools, or Resources Needed
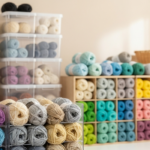
Before you begin crocheting your first project, gathering the right materials prevents unnecessary frustration and sets you up for success. Start with a size H-8 (5mm) aluminum crochet hook—this mid-range size is forgiving for beginners, making stitches easier to see and manipulate than with smaller hooks. Avoid steel hooks initially; their rigidity can strain hands during long practice sessions. For yarn, choose a smooth, light-colored worsted weight (Category 4) acrylic or cotton blend. Dark or fuzzy yarns obscure stitch definition, while slippery fibers like bamboo challenge tension control. A 100–200g skein provides ample material for practice without overwhelming commitment. Essential supporting tools include sharp scissors for clean cuts, a tapestry needle with a large eye for weaving in ends, and a flexible measuring tape to check gauge. Optional but highly recommended: stitch markers (simple plastic rings) to mark rounds or pattern repeats, and a row counter to track progress on repetitive projects. For learning resources, prioritize video tutorials from reputable instructors who demonstrate hand positioning clearly, alongside a printed or digital pattern with explicit abbreviations and diagrams. In many crochet businesses, starter kits bundle these items thoughtfully—when selecting one, ensure it includes full-size tools rather than miniatures that hinder proper technique development.
Yarn Types and Fiber Considerations
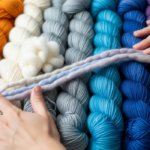
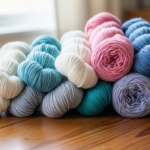
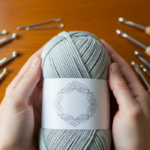
Understanding yarn composition directly impacts your first project’s outcome and your learning experience. For beginners, worsted weight acrylic yarn offers the ideal balance of affordability, stitch definition, and durability. Acrylic is forgiving—it doesn’t split easily under novice tension and maintains shape after washing, crucial when practicing new techniques. Cotton provides excellent stitch definition and a satisfying drape but lacks elasticity, which can make maintaining even tension challenging for new crocheters; reserve it for your second or third project once hand coordination improves. Avoid novelty yarns with sequins, eyelash textures, or irregular thicknesses—they camouflage mistakes but also hide correct stitch formation, impeding skill development. Wool and wool blends offer beautiful elasticity and warmth but require hand-washing care that may frustrate beginners focused on technique rather than maintenance. When selecting color, opt for solid or heathered light tones like cream, light gray, or soft blue; variegated or self-striping yarns create visual distractions that make it difficult to distinguish individual stitches. Fiber content also influences project suitability: acrylic works well for practice swatches and household items, while cotton shines in washable dishcloths or summer accessories. From working with multiple crochet brands, I’ve found that beginners who start with appropriate yarn develop better tension awareness faster—saving time, reducing yarn waste, and building confidence before experimenting with specialty fibers.
Skill Level Breakdown
Crochet skill progression follows a logical trajectory where each level builds upon mastered fundamentals. Beginner crocheters focus on executing basic stitches (slip knot, chain, single crochet, double crochet) with consistent tension, understanding pattern abbreviations, and completing small, flat projects like coasters or scarves without shaping. At this stage, the goal is muscle memory development—not speed or complexity. Intermediate crafters confidently work in the round, follow multi-stitch patterns, incorporate color changes, and adjust sizing using gauge measurements. They troubleshoot common errors independently and experiment with stitch combinations to create textured fabrics. Advanced practitioners design original patterns, master intricate techniques like lacework or filet crochet, and adapt projects for custom sizing or unconventional materials. They understand yarn behavior deeply and can replicate vintage techniques or innovate within traditional frameworks. For your first project, embrace the beginner mindset: prioritize accuracy over speed, accept that initial tension may be uneven, and view mistakes as diagnostic feedback rather than failure. In my teaching experience, students who resist rushing to intermediate techniques before solidifying basics often develop more refined skills long-term. Remember that skill levels aren’t rigid timelines—many experienced crocheters revisit beginner projects to refine tension or test new yarns.
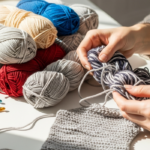
Step-by-Step Guide to Crochet Your First Project
This detailed walkthrough guides you through creating a simple 6×6 inch practice square—a foundational project that teaches core techniques applicable to scarves, blankets, and more. Dedicate 60–90 minutes of uninterrupted time for your first session.
Step 1: Create a Slip Knot
Hold the yarn tail (6-inch end) in your left hand and the working yarn (connected to skein) in your right. Loop the working yarn over the tail to form a circle. Insert your fingers through the circle, grab the working yarn underneath, and pull a loop through. Place this loop on your hook and gently tighten by pulling both ends—adjust so the knot slides smoothly along the hook shaft without slipping off. This adjustable foundation ensures consistent starting tension.
Step 2: Chain Stitch (Foundation Chain)
Hold the hook like a pencil in your dominant hand. With your non-dominant hand, pinch the slip knot between thumb and forefinger, keeping the tail end secured. Yarn over (wrap yarn from back to front over the hook), then pull this loop through the slip knot. You’ve made one chain stitch. Repeat “yarn over, pull through” 20 times for a practice swatch. Maintain even tension by letting the yarn glide smoothly through your guiding fingers—avoid pulling tightly after each stitch. If chains curl or twist, your tension is too tight; if they’re loose and sloppy, gently snug each stitch as you form it.
Step 3: Turn Your Work and Identify Stitches
After completing 20 chains, rotate your work clockwise so the back faces you. Locate the second chain from the hook—this is where you’ll insert your hook for the first row of single crochet. Notice the V-shape at the top of each chain; you’ll work into the top loop of this V unless a pattern specifies otherwise. Turning correctly establishes proper stitch orientation for subsequent rows.
Step 4: Single Crochet Row One

Insert your hook under both loops of the second chain from the hook. Yarn over and pull up a loop (you now have two loops on hook). Yarn over again and pull through both loops on hook—this completes one single crochet. Repeat this process in each remaining chain across the row. When you reach the end, you should have 19 single crochet stitches (the initial skipped chain doesn’t count as a stitch). Count your stitches aloud to build accuracy habits.
Step 5: Turning Chain and Subsequent Rows
At row’s end, chain one stitch (this turning chain lifts your work to the correct height for the next row). Turn your work clockwise again. Insert your hook into the first single crochet of the previous row (not the turning chain) and work a single crochet. Continue across the row, working one single crochet into each stitch. The turning chain does not count as a stitch in single crochet projects—this prevents accidental increases. Repeat rows 4 and 5 until your square measures approximately 6 inches tall, typically 20–25 rows for worsted weight yarn.
Step 6: Fastening Off and Weaving Ends
When your square reaches the desired size, cut the yarn leaving a 6-inch tail. Yarn over and pull this tail completely through the loop on your hook to secure. Thread the tail onto a tapestry needle and weave it horizontally through the back loops of 5–6 stitches on the wrong side of your work. Trim excess close to the fabric. Repeat for the starting tail. Proper finishing prevents unraveling and gives your project a polished appearance essential for gift-giving or selling.
Common Mistakes and How to Avoid Them
Beginners frequently encounter predictable challenges that, when understood early, become easy to correct. Inconsistent tension—alternating between tight and loose stitches—creates a wavy, uneven fabric. Combat this by practicing chain stitches for five minutes before starting your project, focusing on smooth yarn flow through your non-dominant hand’s fingers. Place a small mirror beside your workspace to observe hand positioning without neck strain. Adding or losing stitches typically happens when miscounting chains or working into the turning chain. Always count stitches at the end of each row during your first three projects; use stitch markers in the first and last stitch of each row as visual anchors. Twisted foundation chains occur when the chain rotates during turning. Before starting row one, ensure all chain stitches face the same direction with Vs aligned vertically. Splitting yarn happens when the hook pierces individual plies instead of sliding between them. Slow down during insertion, and ensure your hook enters the stitch center under both loops. From teaching hundreds of beginners, I’ve found that recording a 30-second video of your hands while crocheting provides invaluable feedback—comparing your technique to expert tutorials reveals subtle adjustments needed for smoother execution. Remember that every experienced crocheter made these mistakes; recognizing them as part of the learning process reduces frustration.
Advanced Tips and Professional Insights
Once you’ve completed your first square, integrate these nuanced techniques to accelerate skill development. Tension awareness separates adequate crocheters from exceptional ones. Periodically lay your work flat during projects—if edges flare outward, you’re adding stitches unintentionally; if edges curl inward, you’re working too tightly at row ends. Adjust by consciously relaxing your grip during the last three stitches of each row. Hook material matters: bamboo hooks provide slight grip for slippery yarns, while aluminum offers speed for dense projects. Experiment with ergonomic hooks if you experience hand fatigue—they reduce strain during extended sessions. Reading your work is a professional skill: learn to distinguish stitch types visually without counting. Single crochet creates a dense, ribbed fabric; double crochet forms taller, more open columns. This ability allows you to correct errors rows back without frogging (ripping out) entire sections. Experienced designers often recommend practicing “mindful crocheting”—dedicating the first five minutes of each session to slow, intentional stitching to reset muscle memory before resuming projects. For pattern adaptation, master gauge swatching early: a 4×4 inch swatch worked in your chosen yarn and hook size reveals whether pattern dimensions will match your output. Adjust hook size up or down until your swatch matches the pattern’s specified gauge—this single habit prevents ill-fitting garments later. From consulting with handmade brands, I’ve observed that creators who document their learning journey—including mistakes and corrections—build authentic audience connections that translate into loyal customer bases.
Real-World or Hypothetical Examples
Consider Maria, a graphic designer who learned to crochet during pandemic lockdowns. She began with a simple dishcloth using worsted weight cotton, focusing solely on consistent single crochet tension for two weeks. After mastering the square, she adapted the technique into a marketable product line: textured coasters sold through Etsy. Her initial investment was under $15 for materials, but by documenting her learning process on Instagram—showing both successful swatches and tension mistakes—she built an audience that supported her transition to full-time handmade entrepreneurship within eight months. Another example: a community center in Portland offers “Crochet for Confidence” workshops targeting seniors. Participants start with chunky yarn and large hooks to create wrist warmers, completing their first wearable item in a single 90-minute session. The immediate success rate exceeds 90%, with many attendees progressing to complex projects like afghans within months. These cases illustrate how a well-executed first project serves as both skill foundation and psychological catalyst. In my collaboration with a nonprofit teaching crafts to at-risk youth, we observed that students who completed a tangible first project (even a simple keychain) demonstrated measurably higher persistence in subsequent learning modules compared to those given abstract technique drills without immediate application.
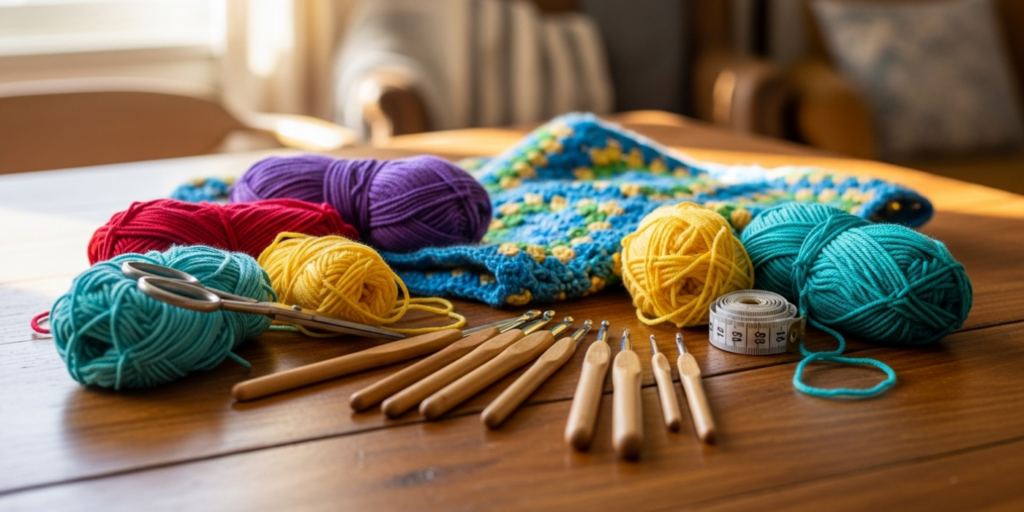
Customization and Adaptation Ideas
Your first project need not be limited to a plain square—thoughtful adaptations maintain motivation while reinforcing fundamentals. Color blocking: After completing ten rows, fasten off and join a contrasting yarn color for the next ten rows. This teaches clean color transitions without complex intarsia techniques. Texture variation: Alternate rows of single crochet with rows of half-double crochet to create subtle ridges—this introduces a new stitch while maintaining simple row structure. Functional shaping: For a headband, chain 80 stitches instead of 20, work five rows of single crochet, then seam the short ends together. This applies flat-work skills to a wearable item with minimal finishing. Scale adjustment: Double your foundation chain to 40 stitches and continue until you have a scarf-length rectangle—ideal for gifting. When adapting projects, always maintain the same yarn weight and hook size initially; changing multiple variables simultaneously complicates troubleshooting. From working with emerging designers, I recommend keeping a “technique journal” where you document each adaptation’s outcome—this becomes an invaluable resource for future pattern development and understanding how small changes affect drape, density, and sizing.
Care, Maintenance, or Best Practices
Proper care extends the life of your handmade items and reinforces professional standards if you sell your work. For acrylic projects, machine wash cold on gentle cycle and lay flat to dry—avoid high heat which can melt fibers. Cotton items may shrink slightly; wash in cold water and reshape while damp. Always attach a care label specifying fiber content and washing instructions—a practice expected by discerning handmade buyers. For storage, fold crocheted items rather than hanging to prevent stretching; place cedar blocks nearby to deter moths for wool pieces. Best practices during creation include washing hands before handling light-colored yarns to prevent oil transfer, and periodically stretching your hands and wrists to avoid repetitive strain. When photographing finished projects for portfolios or listings, use natural daylight and pin items to a foam board to display true dimensions without distortion. In many successful handmade businesses, consistent finishing quality—including invisible seam techniques and secure end weaving—becomes a brand differentiator that justifies premium pricing. Remember that how you care for your creations communicates respect for the craft and your audience.
Monetization Opportunities for Handmade Creators
While your first project focuses on skill-building, understanding potential monetization pathways provides motivating context without pressuring early creativity. Pattern design emerges naturally after mastering several techniques—begin by writing clear instructions for your first successful project and selling digital downloads on platforms like Ravelry or Etsy. Curated kits bundle yarn, hooks, and printed patterns for specific beginner projects; these solve decision fatigue for new crafters and command higher margins than individual components. Workshop instruction leverages your learning journey—teaching absolute beginners online or locally creates recurring revenue while reinforcing your own skills. Custom commissions for simple items like baby blankets or pet bandanas build portfolio pieces and client relationships. Crucially, monetization should follow genuine skill development; premature selling risks negative reviews that damage reputation. From consulting with handmade entrepreneurs, I emphasize that the most sustainable businesses grow from authentic passion—create items you love first, then identify which aspects resonate with potential customers. Educational content like “how to crochet your first project” tutorials can generate AdSense revenue when published on blogs or YouTube, but prioritize genuine value over clickbait to maintain audience trust and platform compliance.
Frequently Asked Questions (FAQ)
What is the easiest first project for absolute beginners?
A small practice square using single crochet stitch is ideal—it teaches foundational techniques without shaping complexity. Dishcloths or coasters provide functional purpose while building muscle memory.
How long does it take to learn to crochet a first project?
Most beginners complete a simple square within 2–4 hours of focused practice. Mastery of consistent tension takes additional sessions, but tangible results arrive quickly with daily 20-minute practice blocks.
What size crochet hook is best for beginners?
A size H-8 (5mm) aluminum hook paired with worsted weight yarn offers optimal visibility and control. Avoid hooks smaller than E-4 (3.5mm) initially—they magnify tension errors and strain hand muscles.
Why does my crochet fabric curl at the edges?
Curling typically indicates inconsistent tension or incorrect hook size for your yarn. Try a hook one size larger, and consciously relax your grip during the last three stitches of each row to prevent edge tightening.
Can I learn to crochet solely from online videos?
Yes—high-quality video tutorials with multiple camera angles effectively teach hand positioning. Supplement with written patterns to learn standard abbreviations and symbols used in published designs.
How do I fix a dropped stitch several rows back?
Use a smaller hook to ladder the dropped stitch back up vertically through each row. For beginners, it’s often faster to carefully unravel back to the error point (“frogging”) and rework correctly—this builds pattern-reading confidence.
Conclusion
Crocheting your first project is far more than learning stitches—it’s the beginning of a creative practice that blends mindfulness, skill development, and tangible accomplishment. By approaching this journey with patience and attention to foundational techniques, you establish habits that support growth into complex patterns, personalized designs, and even entrepreneurial ventures. Remember that every expert crocheter once struggled with tension and stitch counting; what separates them is consistent practice and a willingness to learn from missteps. Your completed first square represents not just a handmade object, but proof of your capacity to transform simple materials into something uniquely yours. As you move forward, revisit these basics periodically—they remain relevant even as your skills advance. The crochet community welcomes makers at every stage; share your first project proudly, seek constructive feedback, and let this initial success fuel your next creative challenge. With each stitch, you’re not just crafting fabric—you’re building confidence, creativity, and connection that extend far beyond the hook and yarn.

Luiza Santos is a passionate crochet and knitting enthusiast who finds joy in transforming simple yarn into meaningful, handmade creations. With a deep love for texture, color, and craftsmanship, she believes every stitch carries a story. Luiza brings warmth, creativity, and years of hands-on experience to everything she makes, inspiring others to discover the beauty of fiber arts.