Imagine walking into a room and everyone turns to look—not because you’re wearing the latest trend, but because no one else has anything like it. You’re not just dressed—you’re expressing yourself. That’s the magic of custom crochet garments. No mass-produced labels, no sizing frustrations, no compromise. Just you, your hands, your yarn, and a piece of art that fits your body, your mood, and your story.
If you’ve ever stared at a sweater in a store and thought, “I wish this was mine—but not like that,” then this article is for you. Designing your own crochet garments isn’t just for seasoned crafters or fashion designers. It’s for anyone who’s ever wanted to wear something truly one-of-a-kind. And the best part? You don’t need a degree in fashion or a studio full of tools. All you need is a hook, some yarn, a little patience, and the courage to start.
In this guide, we’ll walk you through the entire process—from finding your inspiration and choosing the right yarn, to drafting your first pattern and finishing with confidence. Whether you want to make a cozy oversized cardigan, a flirty summer top, or a statement piece for a special occasion, you’ll learn how to turn your vision into reality. By the end, you won’t just know how to crochet a garment—you’ll know why it matters, and how it can change the way you see both fashion and yourself.
Find Your Inspiration: It Starts with a Feeling, Not a Pattern
Before you pick up your hook, pause. Ask yourself: What do I want this garment to feel like?
Is it soft and hugging, like a warm hug on a rainy day? Or is it bold and dramatic, with openwork lace that catches the light like stained glass? Maybe you want something structured and elegant, or loose and bohemian, flowing with every step. Your emotional connection to the piece is more important than any stitch count.
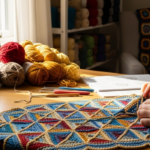
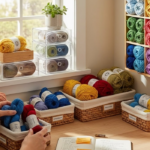
Start by collecting inspiration. Scroll through Pinterest boards, flip through vintage fashion magazines, or even take photos of outfits you admire on strangers (yes, it’s totally okay!). Pay attention to silhouettes, textures, and details. Do you love the drape of a 1970s tunic? The structured shoulders of a 1980s blazer? The effortless ease of a crochet beach cover-up?
Don’t just copy—translate. If you love a designer’s asymmetrical hem but can’t afford the price tag, ask yourself: How can I recreate that feeling with crochet? Maybe it’s a simple increase-decrease pattern on one side, or a gradient color shift that mimics the same visual weight.
Pro tip: Keep an “Inspo Journal.” It doesn’t have to be fancy—just a notebook or a digital folder where you save images, fabric swatches, and notes like “love this neckline” or “need more drape.” Over time, you’ll start seeing patterns in your tastes. And that’s your unique design language emerging.
You’re not copying a trend. You’re curating your personal aesthetic. And that’s the first step to designing something that feels authentically you.
Choose Your Yarn Like You Choose Your Outfit
Yarn isn’t just material—it’s personality. A chunky wool sweater feels different than a lightweight cotton top, even if they’re the same shape. The yarn you choose will determine how your garment drapes, breathes, stretches, and even how it lasts.
Let’s break it down simply:
- Wool & Wool Blends: Warm, elastic, and great for structure. Perfect for winter coats, fitted sweaters, or anything that needs to hold its shape. But beware—some wools can itch. Opt for merino or alpaca blends if you have sensitive skin.
- Cotton & Linen: Breathable, cool, and perfect for summer. They don’t stretch much, so they’re ideal for loose, flowy pieces like tunics or shawls. But they can be heavy when wet—so avoid thick cotton garments if you live somewhere humid.
- Acrylic & Synthetics: Affordable, easy to care for, and available in every color imaginable. Great for beginners or for pieces you want to wash often. But they can pill or look “plastic-y” if not chosen carefully. Look for high-quality, soft acrylics labeled “baby” or “luxury.”
- Bamboo & Soy: Silky, drapey, and eco-friendly. These fibers are dreamy for elegant tops and dresses. They’re a little more delicate, so they’re best for lightweight garments.
Here’s a real-life example: Sarah wanted to make a summer dress for her beach wedding. She tried cotton first—it felt stiff and didn’t move with her body. Then she switched to bamboo blend. The result? A dress that floated like seaweed in the ocean, hugged her curves gently, and stayed cool under the sun. She didn’t just make a dress—she made a memory.
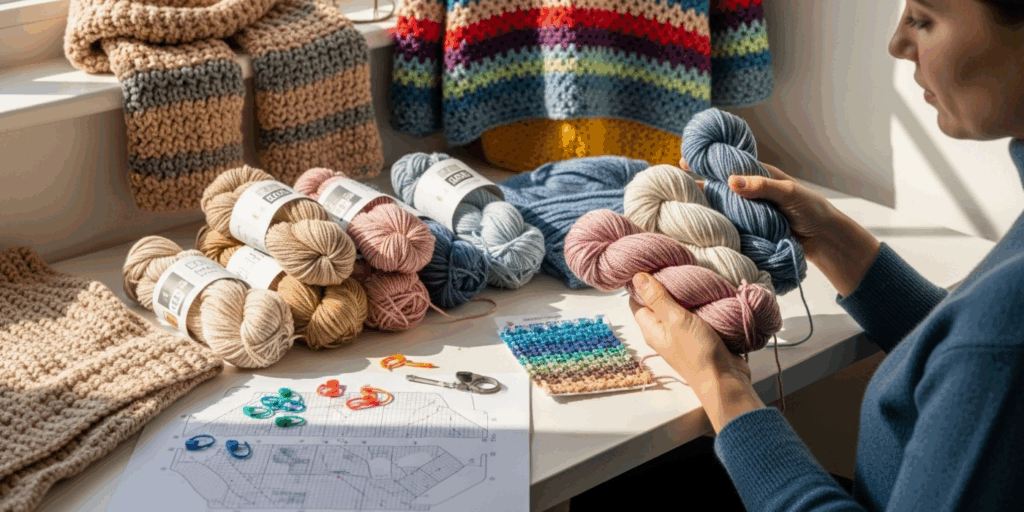
Always buy extra yarn. Seriously. Even if you’re confident in your math, dye lots vary. One skein from a different batch might look slightly off under natural light. And trust me—you don’t want to be halfway through your sleeve and realize you’re out.
Pro tip: Buy your yarn before you finalize your pattern. Let it drape in your hands. Hold it up to the light. Imagine it on your body. If it doesn’t spark joy, try another.
Start Simple: Master the Basics Before You Make Magic
You don’t need to know every stitch in the crochet universe to design your first garment. In fact, starting too complex is the #1 reason people quit.
Begin with a simple shape: a rectangle. Yes, really.
Think of a basic tank top: two rectangles for the front and back, two strips for the straps. Or a cardigan: one big rectangle for the body, two smaller ones for sleeves. That’s it. Once you can make a flat piece with consistent tension, you’ve got the foundation.
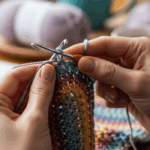
Use a basic stitch—single crochet, half double crochet, or even the classic double crochet—to build your first piece. Don’t overthink it. Focus on even stitches, consistent tension, and measuring as you go.
Here’s a game-changer: Use a gauge swatch. Seriously. Skip this, and your sweater might end up fitting like a potato sack—or a too-tight hug.
How to do it: Crochet a 4×4 inch square using your chosen yarn and hook. Count your stitches and rows. If your pattern calls for 16 stitches = 4 inches and you’re getting 18, your hook is too small. Switch up a size. This simple step saves hours (and heartbreak) later.
And here’s the best part: You can design around your gauge. If your swatch is bigger than expected, make your garment wider. If it’s smaller, add more rows. You’re not bound by a pattern—you’re writing your own rules.
Beginner-friendly project idea: Try a cropped cardigan with no sleeves. Just knit two rectangles (say, 18” wide x 16” long), join the shoulders, and add fringe or buttons. You’ll learn shaping, seaming, and finishing—all in under a weekend.
You’re not making a runway piece. You’re making confidence.
Shape It to You: Crochet Is the Only Fashion That Fits Your Body
Here’s the truth no one tells you: Standard sizes are a myth. Your hips aren’t the same width as your waist. Your shoulders slope differently than the model’s in the pattern. And that’s okay—because you’re not a mannequin.
Custom crochet means you design for your body, not the other way around.
Want a longer torso? Add rows. Need more room in the bust? Increase stitches gradually in that area. Want a flared skirt? Start narrow and add stitches every few rows. That’s the beauty of crochet—it bends to you.
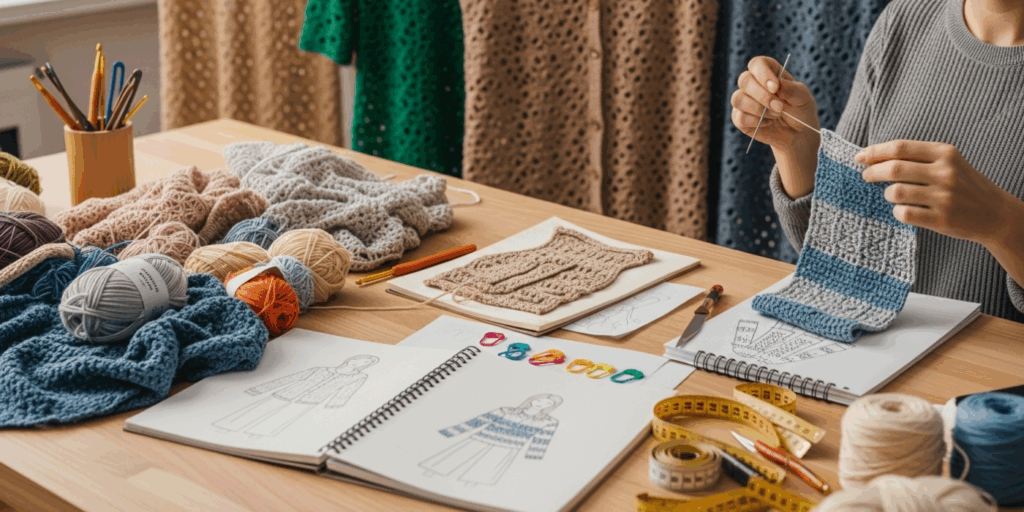
Try this: Before you start, take your measurements. Bust, waist, hips, armhole depth, sleeve length, shoulder width. Write them down. Now, compare them to a basic pattern you like. See where they differ? That’s your design opportunity.
Real story: Maria, a 58-year-old grandmother, hated how store-bought sweaters always pulled across her bust. She started designing her own with a gentle A-line shape—wider at the chest, slightly tapered at the waist. She added lace panels on the sides for breathability. Now, she wears her handmade sweaters every day—and gets compliments from her bridge club weekly.
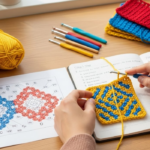
You don’t need to be a math genius. Use graph paper or free online tools like Stitch Fiddle to sketch your design. Color in squares to represent stitches. It’s like pixel art for clothing.
And don’t be afraid to make mistakes. I once made a sweater that was 6 inches too short. Instead of ripping it out, I turned it into a cropped vest. It became my favorite piece.
Your body is your blueprint. Listen to it.
Add Personality: Embellish, Layer, and Make It Uniquely Yours
Now comes the fun part: making it yours.
Once you’ve got the shape, it’s time to play. This is where your garment stops being “just crochet” and becomes art.
Here are simple, powerful ways to personalize:
- Color Blocking: Use 2–3 colors in bold sections. A striped sleeve? A contrasting collar? Instant visual interest.
- Lace Panels: Replace solid stitches with openwork patterns (like shell stitch or pineapple stitch) along the neckline, sleeves, or hem. It adds elegance without bulk.
- Embroidery & Appliqués: Add a tiny flower, a monogram, or a geometric shape with embroidery floss. It’s like jewelry for your sweater.
- Fringe, Tassels, or Beads: A simple fringe along the bottom edge can turn a basic cardigan into a boho masterpiece. Beads? Just thread them onto your yarn as you crochet. So easy, so stunning.
- Mixed Textures: Combine smooth cotton with fluffy bouclé. Or knit a ribbed cuff with a lace yoke. Texture creates depth—and tells a story.
One of my favorite designs? A cropped top with a solid back, but the front? A cascade of tiny crochet roses, each one hand-stitched and slightly offset. It looked like a garden bloomed across my chest. And yes, I got stopped on the street to ask where I bought it.
Remember: You don’t need to do everything at once. Start with one detail. One button. One stripe. One flower. Let that be your signature.
And here’s the secret: People don’t buy clothes because they’re perfect. They buy them because they feel alive. Your garment doesn’t need to be flawless—it needs to feel true.
Finish Like a Pro: The Details That Make It Last
You’ve crocheted the whole thing. The sleeves are done. The body is sewn. Now what?
Finishing is where many crafters give up. But this is the moment your garment goes from “handmade” to handcrafted.
Here’s how to do it right:
- Weave in Ends Neatly: Use a yarn needle to thread loose ends through the back of stitches. Don’t just tie knots—they’ll come undone. Weave for at least 2 inches in different directions.
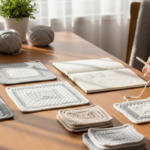
- Block Your Garment: Yes, you need to do this. Wet block your piece (soak in lukewarm water, gently squeeze out water, lay flat on a towel, pin into shape). Let it dry completely. This evens out stitches, opens lace, and gives you that professional, polished look.
- Seam with Purpose: Use the mattress stitch for invisible joins on vertical edges. For horizontal seams (like shoulders), use a whip stitch or crochet slip stitch. Don’t rush it—this is where your garment holds together, literally and emotionally.
- Add Buttons, Zippers, or Ties: If you’re adding closures, choose ones that match your vibe. Wooden buttons for rustic charm. Metallic for glam. Drawstrings for comfort.
- Give It a Name: Seriously. Call it “The Sunbeam Cardigan” or “Grandma’s Hug.” Naming it makes it real. It becomes part of your story.
A well-finished garment lasts. It gets handed down. It’s worn on vacations, to job interviews, to birthdays. It becomes a part of your identity.
And that’s the real reward.
You’re Not Just Crocheting—You’re Reclaiming Fashion
Let’s take a breath.
In a world of fast fashion—where clothes are made in hours, worn once, and thrown away—designing your own crochet garment is an act of rebellion. It’s slow. It’s intentional. It’s quiet resistance against mass production.
Every stitch you make is a moment of mindfulness. Every color choice, a declaration of self. Every finished piece, a testament to your patience, creativity, and courage.
You don’t need permission to make something beautiful. You don’t need a label. You don’t need to be “good enough.”
You just need to start.
So grab your hook. Pick up that yarn you’ve been eyeing. Measure your body. Sketch your dream. Make one small piece. Then another.
And when you wear it—when you feel the softness, the fit, the pride—you’ll realize something profound:
You didn’t just make a sweater.
You made space for yourself.
Now it’s your turn.
What’s the first custom crochet garment you want to make? A cozy hoodie? A lace dress? A statement coat? Drop your idea in the comments below—I’d love to cheer you on. And if this guide inspired you, share it with someone who’s been wanting to start but doesn’t know where to begin.
Your hands are powerful. Your creativity is limitless.
Now go make something only you could have made.

Luiza Santos is a passionate crochet and knitting enthusiast who finds joy in transforming simple yarn into meaningful, handmade creations. With a deep love for texture, color, and craftsmanship, she believes every stitch carries a story. Luiza brings warmth, creativity, and years of hands-on experience to everything she makes, inspiring others to discover the beauty of fiber arts.