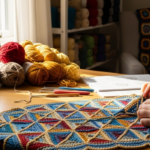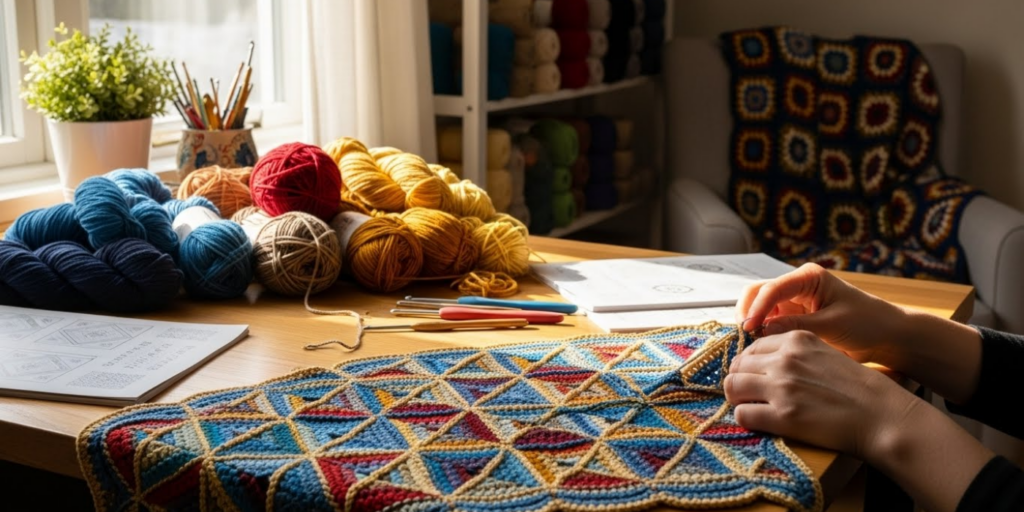
Imagine creating bold, eye-catching geometric designs—zigzags, diamonds, chevrons, and more—with only one color per row and no complicated color changes. Sounds too good to be true? Welcome to the magic of mosaic crochet.
Unlike traditional colorwork that requires juggling multiple yarns at once, mosaic crochet uses a clever stitch technique—usually the mosaic double crochet (mdc) or mosaic slip stitch—to “carry” the unused color from the row below, creating stunning two-color patterns with minimal effort. It’s the perfect blend of visual impact and beginner-friendly technique.
Whether you’re a seasoned crocheter looking to expand your skills or a confident beginner ready to tackle your first colorwork project, mosaic crochet is an accessible and rewarding gateway into textured, graphic design.
In this guide, you’ll discover how mosaic crochet works, why it’s easier than it looks, and step-by-step tips to start your first project with confidence. We’ll break down common stitch patterns, share troubleshooting tricks, and even suggest simple projects to build your mastery.
Get ready to transform simple stitches into modern, geometric art—no advanced colorwork required.
1. What Is Mosaic Crochet—and Why You’ll Love It
Mosaic crochet is a colorwork technique that creates intricate-looking patterns using only one yarn color per row, even though the final design features two (or more) colors. The secret? You work special stitches into the row below, “pulling up” the contrast color from two rows back to form the pattern.
The most common stitches used are:
- Mosaic Double Crochet (mdc): A double crochet worked two rows below, over a skipped stitch.
- Mosaic Slip Stitch: A slip stitch worked into the row below to create subtle texture.
Because you’re only handling one yarn at a time, there’s no twisting, no tangling, and no carrying floats across the back—making it ideal for blankets, scarves, and home decor where neat backs matter.
Why it’s perfect for you:
- ✅ No color changes mid-row
- ✅ Clean, reversible-looking fabric
- ✅ Works with any yarn weight
- ✅ Easy to fix mistakes (just frog back!)
- ✅ Creates bold, modern designs with minimal skill
Think of it like pixel art: each stitch is a pixel, and by skipping certain stitches and working into others two rows down, you “paint” with yarn.
2. How Mosaic Crochet Works: The Basic Concept
At first glance, mosaic charts can look intimidating—filled with X’s, O’s, and color blocks. But once you understand the rhythm, it’s surprisingly logical.
Here’s the core principle:
Every mosaic row is worked over two foundation rows of alternating colors.
For example:
- Rows 1 & 2: Work in Color A
- Rows 3 & 4: Work in Color B
- Row 5: Work in Color A again—but now, you’ll insert your hook two rows down (into Row 3) to pull up Color B in specific places, creating the pattern.
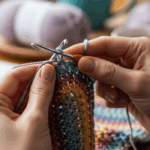
The key stitch—the mosaic double crochet (mdc)—is worked like this:
- Yarn over
- Insert hook two rows below, into the indicated stitch
- Yarn over and pull up a loop (this loop is the contrast color!)
- Complete as a regular double crochet
Important: You always skip the stitch directly above where you’re working the mdc. This skip creates the “negative space” that lets the contrast color shine through.
🌟 Pro Tip: Use stitch markers to mark skipped stitches. It prevents accidental crochet into them and keeps your pattern clean.
3. Getting Started: Your First Mosaic Swatch
Before diving into a full project, make a small practice swatch. This builds muscle memory and helps you spot tension issues early.
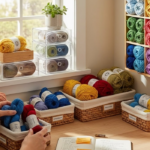
What You’ll Need:
- Two contrasting worsted-weight yarns (e.g., white + navy)
- A 5.0 mm crochet hook
- Scissors and tapestry needle
Simple Chevron Pattern (4-row repeat):
- Rows 1–2: Single crochet in Color A
- Rows 3–4: Single crochet in Color B
- Row 5 (Color A): Sk 1, mdc in next st (pulling up Color B from Row 3), repeat across
- Row 6 (Color A): Single crochet across
- Row 7 (Color B): mdc in next st (pulling up Color A from Row 5), sk 1, repeat
- Row 8 (Color B): Single crochet across
Repeat Rows 5–8 for your pattern.
What to watch for:
- Keep your tension consistent—mosaic stitches can tighten if you pull too hard.
- Count your stitches after every row. Skipped stitches aren’t worked into, but they still “count” in your total.
- Block your swatch—mosaic fabric often relaxes and evens out after washing.
This small swatch will reveal how your yarns interact and whether your hook size creates the drape you want.
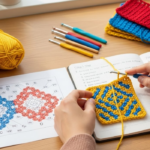
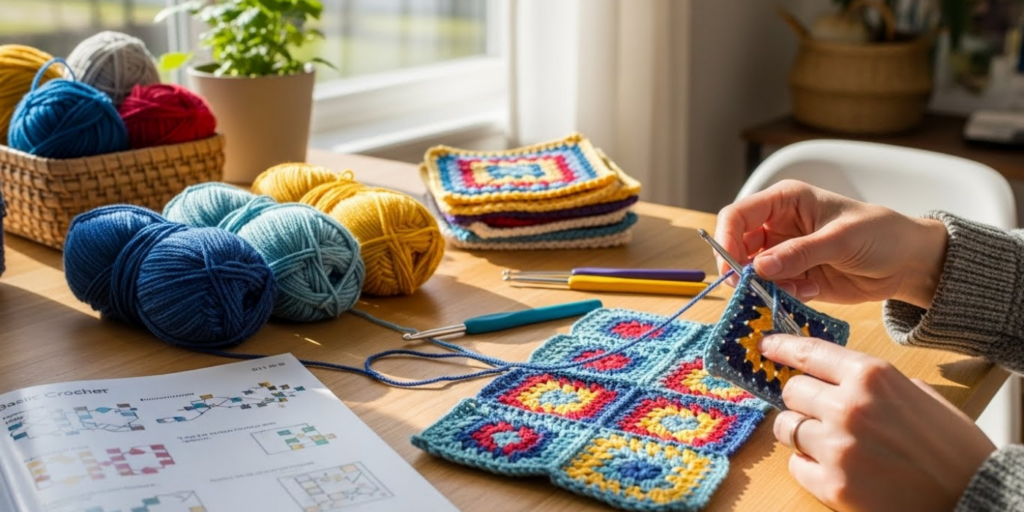
4. Reading Mosaic Charts and Written Patterns
Mosaic patterns come in two forms: written instructions and charts. Many designers provide both, but charts are especially helpful for visual learners.
How to Read a Mosaic Chart:
- Each square = one stitch
- Color blocks show where the contrast color appears
- “X” or “/” symbols often indicate mosaic stitches
- Rows are numbered on the side—odd rows are usually right side (RS)
Example: If Row 5 shows a navy block over a white background, that means you’re working in white yarn (RS), but pulling up navy from two rows below.
Beginner hack: Print the chart and highlight your current row with a sticky note. Move it down as you go—it keeps you from losing your place.
💡 Note: Unlike intarsia or fair isle, you never cut your yarn. You simply drop one color and pick up the next at the end of the row. This reduces ends to weave in!
5. Common Mistakes (and How to Avoid Them)
")
Even experienced crocheters make these mosaic missteps. Here’s how to sidestep them:
❌ Mistake #1: Working into the wrong row
It’s easy to accidentally insert your hook only one row down.
✅ Fix: Always count two full rows below. The stitch you’re targeting should be directly under the skipped stitch.
❌ Mistake #2: Forgetting to skip the stitch above
If you work a regular dc and an mdc in the same column, your fabric will pucker.
✅ Fix: Every mdc replaces a stitch—you skip it on the current row.
❌ Mistake #3: Uneven tension
Mosaic stitches often pull tighter than single crochet, creating a wavy fabric.
✅ Fix: Use a hook 0.5–1.0 mm larger for the mosaic rows, or consciously relax your grip when working mdc.
❌ Mistake #4: Losing track of rows
Because you work two rows in the same color, it’s easy to lose count.
✅ Fix: Use a row counter or mark every 10th row with a safety pin.
Remember: Mistakes are part of learning. Frogging a few rows is far easier than fixing a whole blanket!
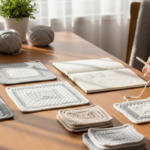
6. Project Ideas to Build Your Confidence
Ready to apply your skills? Start with these beginner-friendly mosaic projects:
🧶 1. Geometric Coasters
- Quick, low-yarn projects
- Perfect for testing color combos
- Great gift idea!
🧣 2. Striped Mosaic Scarf
- Use a 4-row mosaic repeat down the length
- Add fringe for extra flair
- Showcases drape and pattern clarity
🛏️ 3. Baby Blanket with Diamond Motif
- Work a simple diamond repeat
- Soft cotton or acrylic yarn for easy care
- Feels far more advanced than it is!
🧵 4. Modern Pillow Cover
- Crochet a panel, then sew onto a plain insert
- Instant home decor upgrade
- Easy to customize size
Pro tip: Choose high-contrast colors (black/white, navy/cream) for your first project. Subtle tones can make patterns hard to see while you’re learning.
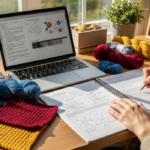
7. Taking It Further: Designing Your Own Mosaic Patterns
Once you’ve mastered the basics, you might want to create your own designs. Here’s how:
- Start with graph paper (or a digital grid app like Stitch Fiddle).
- Shade in blocks to form shapes—chevrons, hearts, waves.
- Remember: each colored block = one mosaic stitch worked two rows below.
- Keep patterns symmetrical and repeating for easier execution.
- Test your design in a 6×6” swatch before committing.
You can even convert cross-stitch or pixel art patterns into mosaic crochet—just ensure your design has clean lines and enough space between elements.
🌈 Fun fact: Many mosaic designers use slip stitch mosaics for finer detail, or combine mdc with texture stitches (like bobbles) for 3D effects.
The possibilities are limited only by your imagination—and your yarn stash!
Conclusion: Unlock Bold Design with Simple Stitches
Mosaic crochet proves that complex-looking results don’t require complex techniques. With just basic stitches, careful skipping, and a little rhythm, you can create stunning geometric patterns that look anything but beginner-level.
More than a technique, mosaic crochet is a gateway to creative confidence. It teaches you to read charts, manage tension, and think in patterns—all while producing beautiful, usable items.
So grab two skeins of contrasting yarn, your favorite hook, and give it a try. Don’t worry about perfection. Focus on the joy of seeing a design emerge, row by row, from simple, deliberate stitches.
Your next masterpiece is just one mosaic row away.
👉 Now it’s your turn: Have you tried mosaic crochet before? What’s the first pattern you’d love to make? Share your thoughts or questions in the comments below! And if you found this guide helpful, pin it for later or share it with a fellow maker—because everyone deserves to experience the magic of making art with yarn.
Remember: Great design isn’t about complexity—it’s about clarity, contrast, and the courage to start.

Luiza Santos is a passionate crochet and knitting enthusiast who finds joy in transforming simple yarn into meaningful, handmade creations. With a deep love for texture, color, and craftsmanship, she believes every stitch carries a story. Luiza brings warmth, creativity, and years of hands-on experience to everything she makes, inspiring others to discover the beauty of fiber arts.