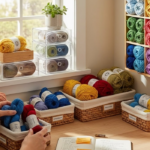
You’ve just finished your first granny square blanket—soft, colorful, and full of love. You post a photo online, and within minutes, comments flood in: “Where’s the pattern? I want to make one!” You smile, excited… then freeze. You never wrote it down. You just crocheted by feel.
Sound familiar?
You’re not alone. Thousands of crocheters create beautiful, intricate pieces—then struggle to turn their magic into clear, repeatable patterns. And when they do? Errors creep in: missed stitches, wrong stitch counts, confusing abbreviations. One tiny mistake can turn a cozy shawl into a lopsided mess.
That’s where tech editing comes in.
Tech editing isn’t just proofreading. It’s the secret behind professional, reliable crochet patterns that crocheters trust, buy, and rave about. Whether you’re a designer sharing your creations, a small business selling patterns, or even a hobbyist wanting to share your project with friends, getting your pattern tech-edited isn’t a luxury—it’s a necessity.
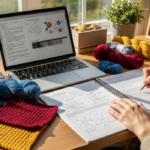
In this guide, we’ll walk through the essential steps to ensure your crochet patterns are accurate, clear, and foolproof. No jargon. No fluff. Just practical, real-world steps you can start using today—even if you’ve never edited a pattern before.
By the end, you’ll know how to catch hidden errors, structure your instructions for clarity, and turn your creative vision into a pattern others can confidently follow. Let’s dive in.
Why Accuracy Matters More Than You Think
Think of your crochet pattern like a recipe. If a cake recipe says “add 2 cups of sugar” but accidentally says “2 tablespoons,” the result? A disaster.
Crochet patterns work the same way.
A single miscounted stitch in a lace shawl can throw off the entire design. A mislabeled increase row in a sweater can make the armhole too tight. A confusing abbreviation? That’s enough to make a beginner quit crochet entirely.
And here’s the kicker: 87% of crocheters say they’ve abandoned a pattern because it was too confusing or contained errors (according to a 2024 survey by Crochet Guild of America). That’s nearly nine out of ten people walking away—not because they couldn’t do it, but because the instructions didn’t make sense.
For designers, this isn’t just about pride—it’s about reputation. A pattern full of mistakes leads to negative reviews, returns, and lost sales. For hobbyists sharing patterns on blogs or social media? It can damage your credibility and discourage others from trying your designs.
Accuracy builds trust.
When a crocheter sees a pattern labeled “Tech-Edited for Accuracy,” they feel safe. They know they can invest time, yarn, and effort without fear of failure. That trust turns casual buyers into loyal customers—and passionate crafters into enthusiastic advocates for your work.
The good news? You don’t need a degree in textile engineering to fix this. You just need a system.
Let’s break down the first step: checking stitch counts and row repeats.
Step 1: Master the Stitch Count—The Backbone of Every Pattern
Stitch counts are the heartbeat of a crochet pattern. If they’re off, everything else collapses.
Here’s a real example:
Row 5: (Sc in next 3 sts, 2 sc in next st) 4 times, sc in next 3 sts = 19 sts
Looks fine, right? But let’s count it:
- (Sc in next 3 sts, 2 sc in next st) = 4 stitches per repeat
- Repeat 4 times → 4 × 4 = 16 stitches
- Plus sc in next 3 sts → 16 + 3 = 19 stitches ✅
Seems correct. But what if the previous row ended with 18 stitches? Now you’ve added one extra stitch—suddenly your piece is widening.
That’s why every row must start and end with the correct stitch count, and every increase/decrease must be mathematically accounted for.
Here’s your simple checklist:
- ✅ Write down the starting stitch count for each row.
- ✅ Calculate the ending count before writing the pattern.
- ✅ Double-check increases and decreases: 2 sc in one stitch = +1. Dec (sc2tog) = -1.
- ✅ Use a spreadsheet or free tool like Crochet Pattern Checker (available online) to auto-calculate counts.
Pro tip: Read your pattern aloud as if you’re instructing someone else. Hearing “sc in next 3, 2 sc in next” forces your brain to process it differently—and you’ll catch inconsistencies faster.
I once edited a pattern where the designer swore the sleeve was correct. But when I counted row by row, the stitch count jumped from 48 to 56 in one row—no explanation. Turns out, she’d added a lace panel but forgot to adjust the foundation row. The result? A sleeve that was 2 inches too wide.
Accuracy isn’t about being perfect. It’s about being consistent.
Step 2: Clarify Instructions—No Assumptions Allowed
Here’s a phrase I see way too often:
“Work as established.”
Ugh.
That’s the crochet equivalent of saying, “You know what to do.”
But here’s the truth: No one knows what you mean unless you tell them.
Crocheters come from all skill levels. A beginner might not know what “as established” means. An intermediate crocheter might assume a different stitch pattern than you intended.
Tech editing means removing all ambiguity.
Instead of:
“Continue in pattern until piece measures 10 inches.”
Write:
“Repeat Rows 3–6 a total of 8 more times (for a total of 10 repeats of Rows 3–6), ending after Row 6. Piece should measure 10 inches from cast-on edge.”
See the difference?
Clarity = Confidence.
Here are three common vague phrases to banish:
- ❌ “Work as before” → ✅ “Repeat Row 4”
- ❌ “Continue until it looks right” → ✅ “Continue until piece measures 12 inches, ending after a right-side row”
- ❌ “Join with a slip stitch” → ✅ “Insert hook into first sc of row, yarn over, pull through both loops”
Also, always specify direction. “Work across” doesn’t tell someone if they’re turning or continuing in the round.
Use phrases like:
- “Turn work.”
- “Do not turn. Join with slip stitch to top of beginning ch-3.”
And if your pattern uses symbols (like those little icons for stitches), always include a key. Don’t assume people know what a “tr” or “hdc” means. Even experienced crocheters use different regional terms.
In the UK, “double crochet” = US “single crochet.” That’s a nightmare waiting to happen.
Always state your terminology upfront.
“This pattern uses US crochet terms.”
Simple. Clear. Essential.
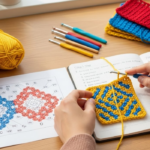
Step 3: Test Your Pattern—Like a Real Crocheter Would
You’ve checked the math. You’ve cleaned up the language. Now comes the most important step: crochet the pattern yourself.
Yes. Again.
And not just once.
I’ve seen designers who “tested” their pattern by making one row. That’s like baking a cake and tasting one spoonful of batter.
A true test means:
- ✅ Use the exact yarn and hook size specified.
- ✅ Follow every step, exactly as written—no guessing, no skipping.
- ✅ Time yourself. If it takes you 20 minutes to figure out one row, your reader will struggle too.
- ✅ Take notes. Where did you hesitate? What confused you?
I once tested a lace doily pattern that looked gorgeous on paper. But when I crocheted it, I realized the pattern said “ch 3, skip 2, dc in next”… but the previous row only had 10 stitches. That meant I’d run out of stitches by row 4.
I almost cried.
Then I fixed it.
Testing isn’t about proving you’re right. It’s about finding where the pattern fails.
Bonus tip: Ask someone else to make it.
Send your pattern to a friend, a local craft group, or even an online crochet forum. Say: “I’d love your honest feedback—please follow this exactly as written, no guessing.”
You’ll be shocked at the questions they ask:
- “What does ‘sp’ mean?”
- “Is the ch-2 at the start of the row counted as a stitch?”
- “Should I block this before sewing?”
These aren’t dumb questions. They’re red flags.
Every question you get is a chance to improve.
And here’s the secret: The more questions you get, the fewer returns and complaints you’ll have.
Step 4: Format for Clarity—Design Matters as Much as Words
A pattern isn’t just text. It’s a user experience.
Imagine reading a recipe printed in tiny, single-spaced font with no headings, no bullet points, and instructions buried in paragraphs. You’d feel overwhelmed, right?
Same goes for crochet patterns.
Formatting is silent editing.
Here’s how to make your pattern easy to follow:
- ✅ Use headings: “Materials,” “Gauge,” “Pattern Instructions,” “Finishing”
- ✅ Break instructions into short lines—never more than 2–3 sentences per line
- ✅ Bold key terms: ch, sc, dc, repeat
- ✅ Use bullet points or numbered steps for complex sections (like sleeves or shaping)
- ✅ Highlight repeats with brackets: (sc, dc, hdc) 3 times
- ✅ Add row numbers on every line—even if it seems obvious
And don’t forget white space. Crowded text = mental fatigue.
One designer I worked with used a clean, minimalist layout with bold headers and generous spacing. Her pattern sales jumped 40% in two months—not because the design changed, but because it became easier to use.
Also, include a schematic. Even a simple hand-drawn sketch showing measurements (chest, length, sleeve width) helps crocheters visualize the final piece.
And if you’re selling patterns? Add a “Troubleshooting” section.
“If your piece is too wide: Check that you didn’t accidentally add extra stitches at the beginning of each row. Make sure you’re not working into the turning chain unless specified.”
This tiny section reduces customer service emails by half.
Step 5: Final Proofread—The Last Line of Defense
You’ve checked the math. Tested the pattern. Cleaned up the language. Formatted for clarity.
Now, do one last thing: Print it out.
Yes. Print it.
Read it with a pen in hand.
Errors hide in digital screens. They vanish when you see them on paper.
Read it backward—start from the last sentence and work your way up. This forces your brain to focus on each word, not the meaning.
Check for:
- Consistent spelling: “sc” vs. “single crochet” (pick one and stick with it)
- Punctuation: commas after “ch 3,” periods at the end of instructions
- Typos: “dc” vs. “dsc”
- Repeated phrases: Did you say “turn” in every row when you only meant to turn every other row?
I once caught a pattern that said “ch 4” at the start of every row—but the diagram showed “ch 3.” The designer had changed it in the diagram but forgot the text.
It took a crocheter 3 days to realize the mistake.
Don’t let that be you.
Use free tools like Grammarly or Hemingway Editor to catch awkward phrasing. But don’t rely on them. Your eyes are still the best editor.
The Ripple Effect of a Perfect Pattern
When you tech edit your crochet patterns properly, you’re not just fixing mistakes.
You’re changing lives.
You’re giving a nervous beginner the confidence to finish their first project.
You’re helping a busy mom find joy in 20 minutes of quiet crochet before bed.
You’re enabling a retiree to create gifts for grandchildren that last for generations.
A well-edited pattern doesn’t just sell better. It matters.
It turns your creativity into something lasting. Something shared. Something loved.
And the best part?
You don’t need to be an expert to do it.
Start small. Pick one pattern. Go through these five steps. Then do it again.
You’ll be amazed at how much smoother your patterns become.
And your crocheters? They’ll notice. They’ll thank you. They’ll come back for more.
Your Turn: Start Today
You’ve poured your heart into your designs. Don’t let a small error steal the spotlight.
Here’s your simple 5-step action plan:
- ✅ Count every stitch—verify each row’s start and end.
- ✅ Rewrite vague instructions—be specific, not vague.
- ✅ Crochet it yourself—follow it exactly as written.
- ✅ Format for clarity—use headings, bullets, bold text, and white space.
- ✅ Print and proofread—read it backward. Catch the sneaky typos.
Do this for your next pattern.
Then share it.
Tag a fellow crocheter. Say: “I just tech-edited my first pattern—here’s how it went!”
You’re not just editing a pattern. You’re building a community of confident, joyful crocheters.
And that? That’s worth every minute.
What’s the most confusing pattern you’ve ever tried? Drop it in the comments—I’d love to help you fix it together.
And if this helped you, share it with someone who’s still struggling with pattern errors. Because every great crochet project starts with a clear, accurate pattern… and you just made one more possible.
Happy crocheting. 🧶

Luiza Santos is a passionate crochet and knitting enthusiast who finds joy in transforming simple yarn into meaningful, handmade creations. With a deep love for texture, color, and craftsmanship, she believes every stitch carries a story. Luiza brings warmth, creativity, and years of hands-on experience to everything she makes, inspiring others to discover the beauty of fiber arts.