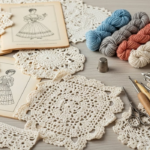
Have you ever tried crocheting in the round and ended up with a hole in the center of your project? Whether you’re making amigurumi, coasters, granny squares, or baby hats, that little gap can turn a cute creation into a frustrating mess. But what if I told you there’s a simple, almost magical solution that gives you a perfectly closed center every time?
Enter: the magic ring (also called the magic circle or adjustable ring). This beginner-friendly technique is a game-changer for anyone who crochets in the round—and the best part? It’s easier than it looks.
In this step-by-step tutorial, you’ll learn exactly how to make a magic ring, why it’s superior to older methods, and how to use it in real projects. We’ll walk through it slowly, with clear explanations, common pitfalls to avoid, and tips to build your confidence. No prior experience beyond basic crochet stitches is needed!
Ready to close that gap for good? Let’s dive in.
Why the Magic Ring Beats Traditional Methods
Before the magic ring became popular, crocheters typically started rounds by chaining 4–6 stitches and joining them with a slip stitch to form a loop. Then, they’d work their first round into that circle.
Sounds simple—but here’s the problem: that initial loop never fully closes. No matter how tightly you pull the tail, a small hole remains in the center. For projects like stuffed animals or toys, this means stuffing can poke through. For dishcloths or decorative items, it just looks messy.
The magic ring solves this by creating a fully adjustable loop that you can pull shut after completing your first round. The result? A seamless, professional-looking center—no gaps, no guesswork.
Benefits you’ll notice right away:
- Clean, tight center for amigurumi and toys
- Better tension control from the very first stitch
- More polished finished projects (great for gifts or selling!)
- Works with any stitch pattern: single crochet, double crochet, even clusters
Best of all, once you learn it, the magic ring becomes second nature—like tying your shoes.
What You’ll Need to Get Started
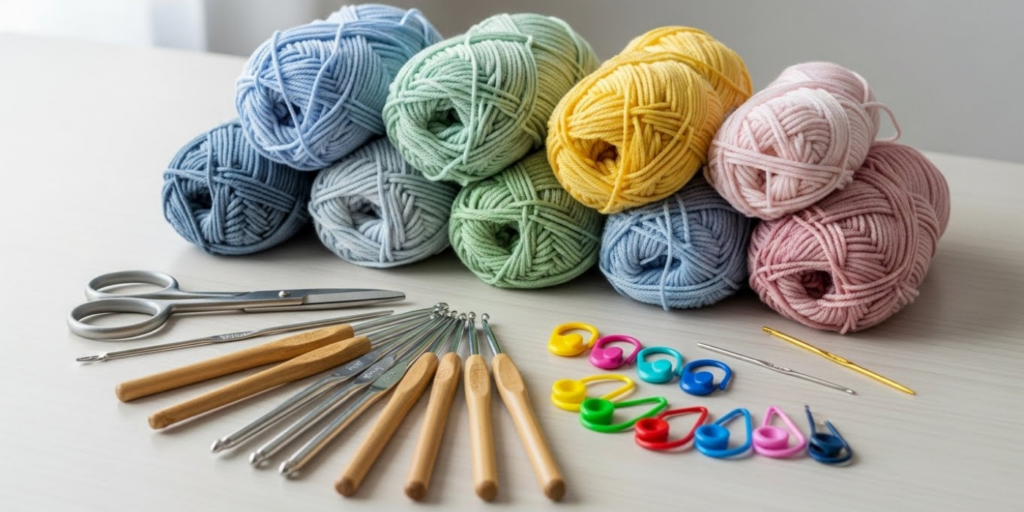
Good news: you don’t need any special tools. Just the basics:
✅ Yarn – Medium weight (worsted/Category 4) is ideal for beginners. Avoid slippery or very fuzzy yarns at first—they can make it harder to see your stitches.
✅ Crochet hook – Use the size recommended on your yarn label (usually a 5.0mm or 5.5mm for worsted weight).
✅ Scissors
✅ Tapestry needle (for weaving in ends later)
Pro tip: Use a light-colored yarn for your first few tries. Dark or variegated yarns can make it harder to see your loop and stitches clearly.
You’ll also need about 10–15 minutes and a willingness to try it 2–3 times. Most beginners get it by the third attempt!
Step-by-Step: How to Make a Magic Ring
Let’s break it down into simple, doable steps. Go slowly—you’ve got this!
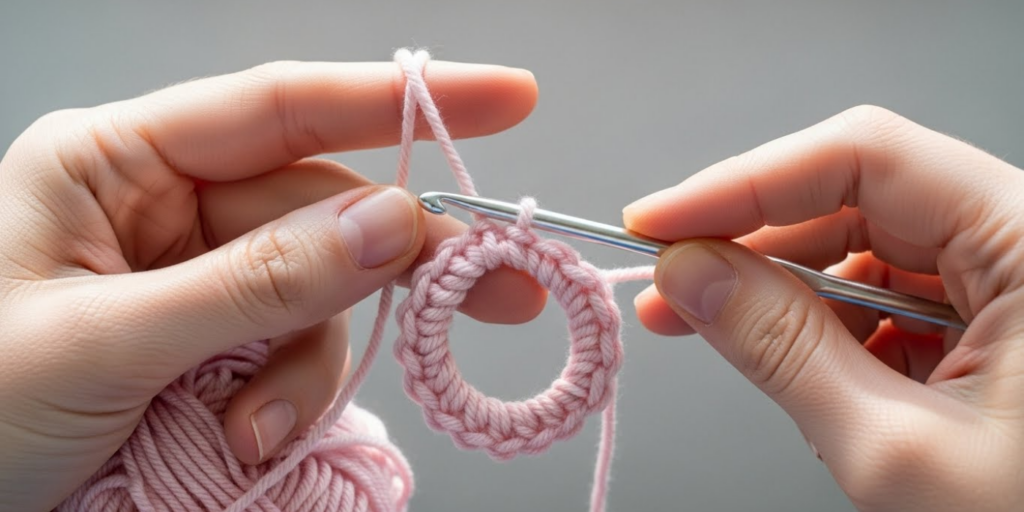
Step 1: Create the Loop
Hold the tail end of your yarn (leave about a 6-inch tail) in your left hand. Drape the working yarn (the part connected to the skein) over your index and middle fingers, forming a loop that crosses over itself like a lowercase “q.”
Think of it like making the first motion of tying a shoelace—but don’t pull it tight yet!
Step 2: Insert Your Hook
With your crochet hook in your right hand, insert it under the top strand of the loop (the one closest to you), then grab the working yarn (from behind the loop) with your hook.
Now, gently pull that working yarn back through the loop to create a chain stitch. You should now have one loop on your hook—the beginning of your first stitch.
Step 3: Work Your First Stitch
Now, work your first stitch into the ring. For beginners, we’ll start with a single crochet (sc):
- Yarn over
- Pull up a loop (you’ll have 2 loops on your hook)
- Yarn over again
- Pull through both loops
You’ve just made your first single crochet inside the magic ring!
Important: Keep your ring loose as you work. Don’t pull the tail yet—you’ll tighten it after you finish the full round.
Step 4: Complete Your First Round
Continue working the required number of stitches into the ring. For example:
- Amigurumi bodies often start with 6 single crochets
- Coasters might begin with 8 double crochets
As you crochet, your stitches will sit around both strands of the ring (the top and bottom). Keep your tension relaxed—this makes it easier to close the ring later.
Step 5: Close the Ring
Once your round is complete, pull the tail end gently but firmly. The loop will cinch shut, closing the center completely.
Do this before you join with a slip stitch (if your pattern calls for it). If you slip stitch first, the ring may not close evenly.
Step 6: Secure and Continue
After closing the ring, give the tail a gentle tug to ensure it’s snug. Then, either:
- Join with a slip stitch to the first stitch (for joined rounds), or
- Continue working in a spiral (common in amigurumi—no joining needed)
Later, weave in the tail end with your tapestry needle to secure it.
Common Mistakes (and How to Fix Them)
Even experienced crocheters had trouble with the magic ring at first. Here are the most frequent hiccups—and how to solve them:
❌ “My ring won’t stay closed!”
You likely didn’t work your stitches around both strands of the loop. Always insert your hook under the top strand and over the bottom tail. This “captures” both threads, allowing the ring to close.
❌ “The yarn keeps slipping!”
Use a less slippery yarn (like cotton or acrylic) while learning. Wool can be too slick for beginners.
❌ “I can’t see the loop!”
Try placing a dark piece of paper or fabric under your work to create contrast. Or use a brightly colored yarn.
❌ “My first round is too tight!”
Keep your initial loop loose and open—about the size of a quarter. You’ll tighten it after stitching, not before.
Remember: It’s normal to frog (rip out) your first 2–3 tries. Every crocheter has been there!
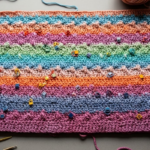
Projects Perfect for Practicing the Magic Ring
The best way to master the magic ring is to use it in real projects. Here are beginner-friendly ideas:
- Amigurumi balls – Start with 6 sc in a magic ring, then increase evenly. Great for stress balls or cat toys.
- Coasters – Work 8 dc in a ring, then add a few decorative rounds.
- Granny squares (center) – Many modern patterns use a magic ring for a cleaner start.
- Baby booties or hats – Often begin with a magic ring for a snug, hole-free crown.
Fun fact: Over 90% of contemporary amigurumi designers use the magic ring exclusively—it’s become the standard for a reason!
Troubleshooting: What If I Still Can’t Get It?
If you’re struggling after several tries, try this alternative method:
- Wrap the yarn twice around two fingers instead of once.
- This creates a more stable loop that’s easier to control.
- Work your stitches as usual, then pull the tail to close.
You can also watch a slow-motion video (links to trusted tutorials in the resources section below). Sometimes seeing it in action makes all the difference.
And remember: crochet is a skill, not a talent. It improves with practice—not perfection.
Why This Skill Will Transform Your Crochet Journey
Mastering the magic ring does more than just close a hole—it builds confidence, control, and creativity. Once you’ve got it down:
- You’ll feel comfortable tackling more complex patterns
- Your handmade gifts will look more professional
- You’ll waste less yarn (no more do-overs due to sloppy centers!)
- You’ll join a global community of makers who swear by this technique
Think of the magic ring as your secret weapon—it’s simple, powerful, and always ready when you need it.
Final Tips for Long-Term Success
To make the magic ring truly stick:
🔁 Practice daily – Even 5 minutes a day helps your muscle memory develop.
🧵 Use the same yarn/hook combo while learning to build consistency.
📓 Keep a “swatch journal” – Note what works (and what doesn’t) for future reference.
❤️ Be patient with yourself – Every expert was once a beginner staring at a stubborn loop.
Conclusion: Your Crochet Just Got a Whole Lot Smoother
The magic ring might seem tricky at first glance, but with a little patience and the right guidance, it quickly becomes one of the most useful tools in your crochet toolkit. No more gaps, no more frustration—just clean, professional-looking projects that you’ll be proud to show off.
Whether you’re making cute stuffed animals for your kids, cozy gifts for friends, or just enjoying a mindful hobby, this technique will elevate your work from “homemade” to “handcrafted.”
So grab your hook, choose a cheerful skein of yarn, and give the magic ring a try. You might just wonder how you ever crocheted without it.
Did you nail the magic ring on your first try—or did it take a few attempts? Share your experience in the comments below! And if this tutorial helped you, pass it on to a fellow crafter who’s ready to close that gap for good. Happy hooking! 🧶

Luiza Santos is a passionate crochet and knitting enthusiast who finds joy in transforming simple yarn into meaningful, handmade creations. With a deep love for texture, color, and craftsmanship, she believes every stitch carries a story. Luiza brings warmth, creativity, and years of hands-on experience to everything she makes, inspiring others to discover the beauty of fiber arts.